
One of the most common questions new keepers ask is what enclosure to actually get and the honest answer is that there's no single right option. What works depends on your budget, your time, your skills, and whether you want something functional or something you're genuinely proud to have in your home.
This post covers all three approaches we use ourselves, from the cheapest functional setup you can put together for under €30 to the custom oak vivarium that took six days of drying time and considerably more patience. All three work. The snakes don't know what their enclosure cost. They care about temperatures, security, and space. What changes between the options is mostly what you as the keeper get out of the experience.
We'll start with the simple/cheapest option.
Total cost: approximately €25-55 depending on which container you choose
Time to set up: 30-45 minutes
This is where a lot of keepers start, and there's nothing wrong with that. A well-set-up plastic tub is a genuinely good environment for a hatchling or juvenile hognose. The enclosed, dark space actually makes many snakes feel more secure than an open glass enclosure would. Don't let the simplicity fool you into thinking it's a compromise. Done correctly, it works.
Option A: Braplast Container 3L, 24x18x7.5cm — approx. €1.80
A basic plastic storage container with a lid. At this size it's appropriate from hatching through to approximately 50 grams (roughly the first year of life, sometimes a little longer depending on growth rate). At that point the snake will have outgrown it and needs to move to something bigger.
The Braplast lid has some ventilation built in, but we add additional holes on the sides for better airflow. A soldering iron is the easiest tool for this. Press the tip through the plastic to melt clean holes rather than drilling, which can crack the container. Space them evenly around the upper portion of the sides. You want enough airflow to keep air fresh without creating drafts or dropping humidity too dramatically.
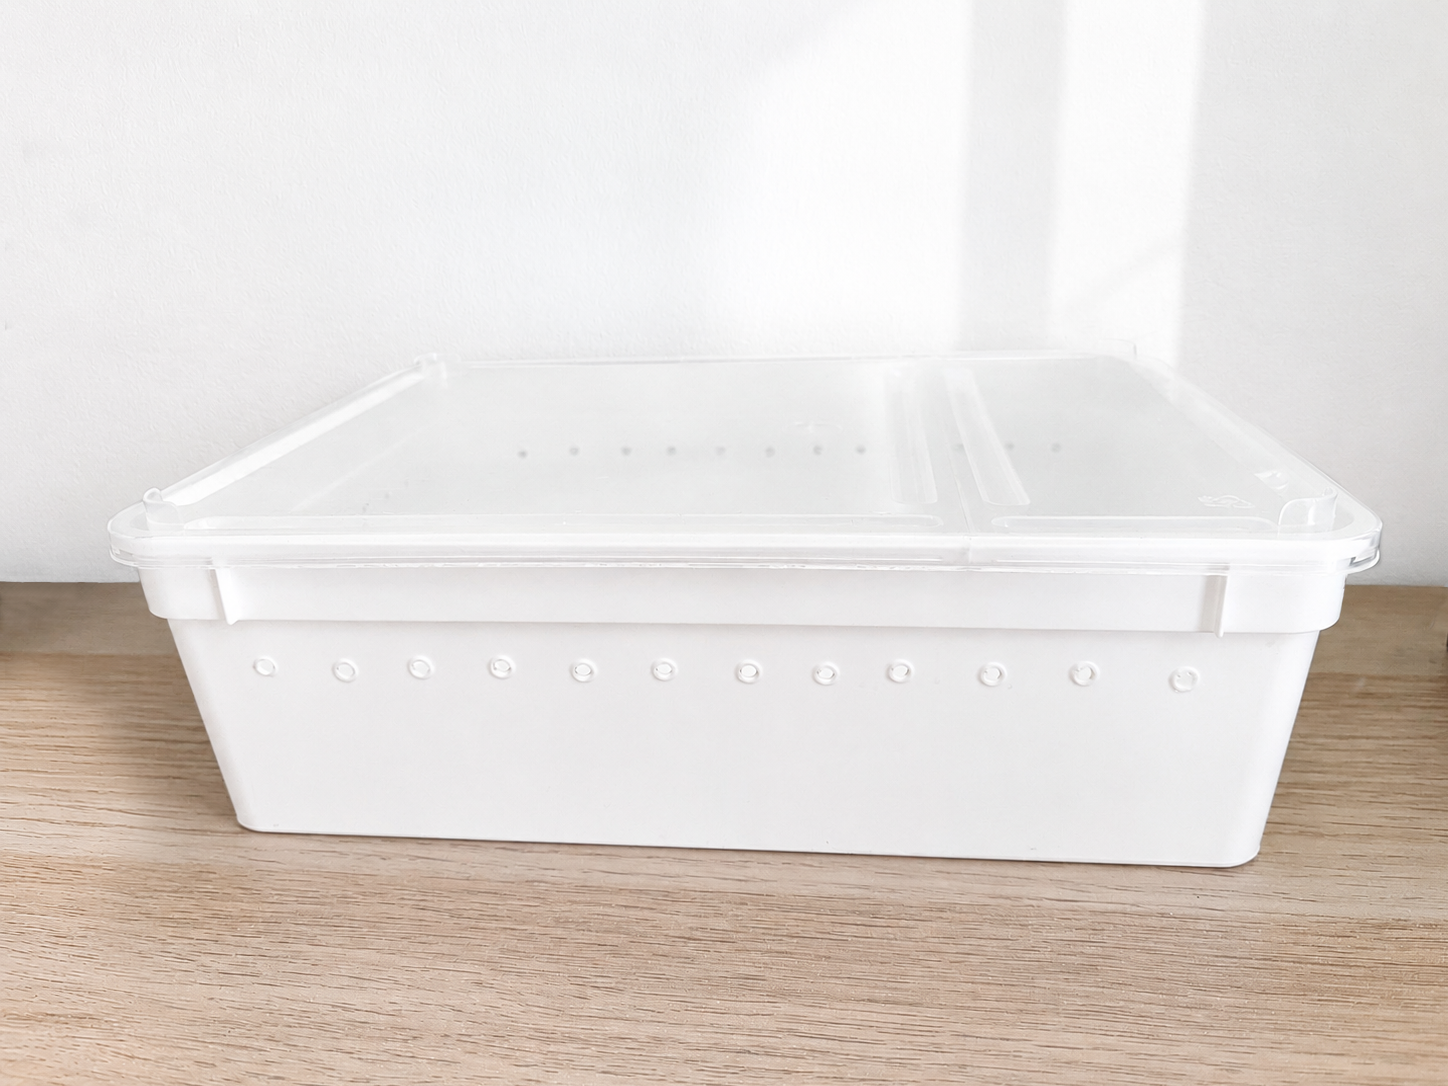
Option B: Exo Terra Faunarium XL, 46x30x17cm — approx. €28
A step up from the basic tub. This is a purpose built plastic terrarium rather than a repurposed storage container. The ventilation is already adequate so no modification is needed, the lid clips securely, and the larger footprint means you can use it from hatchling all the way through to approximately 90-100 grams before needing to upgrade. If you're happy to spend a little more at the start in exchange for not having to upgrade as quickly, this is the better value option of the two.
Reptile Nova Heat Mat 5W, 15x14cm — approx. €9
The heat mat goes under one end of the tub — the warm end. For the Braplast specifically, the mat is large enough to heat two small tubs simultaneously side by side, so if you're setting up multiple babies you can position them both on the same mat. Don't place the full mat under a single small tub. The heating would be too intense and unevenly distributed. Position the tub so roughly half its base sits over the mat.
You don't need to fix the mat to the tub. Just place the tub on top of it.
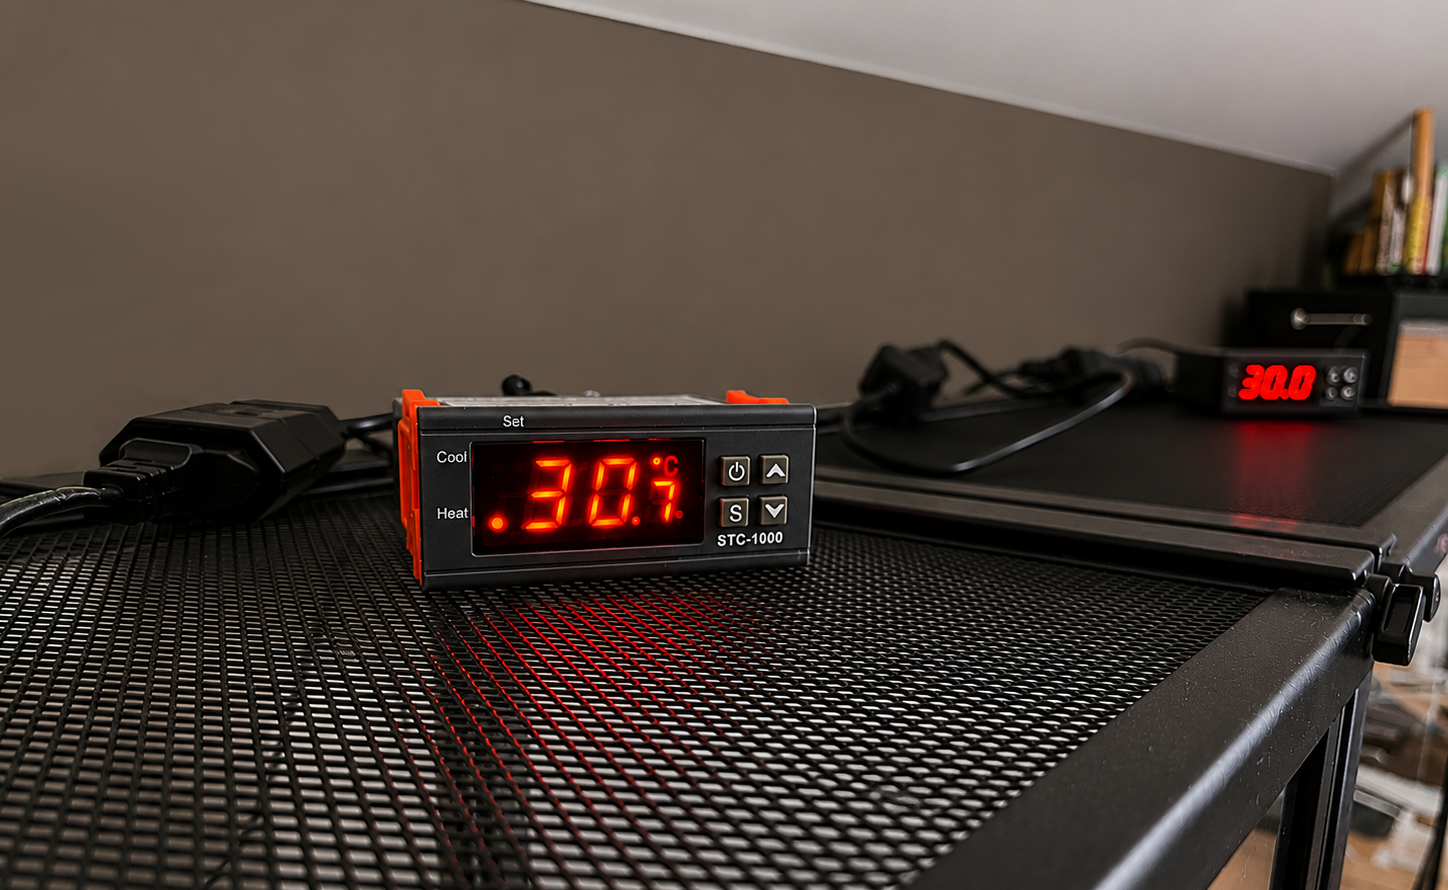
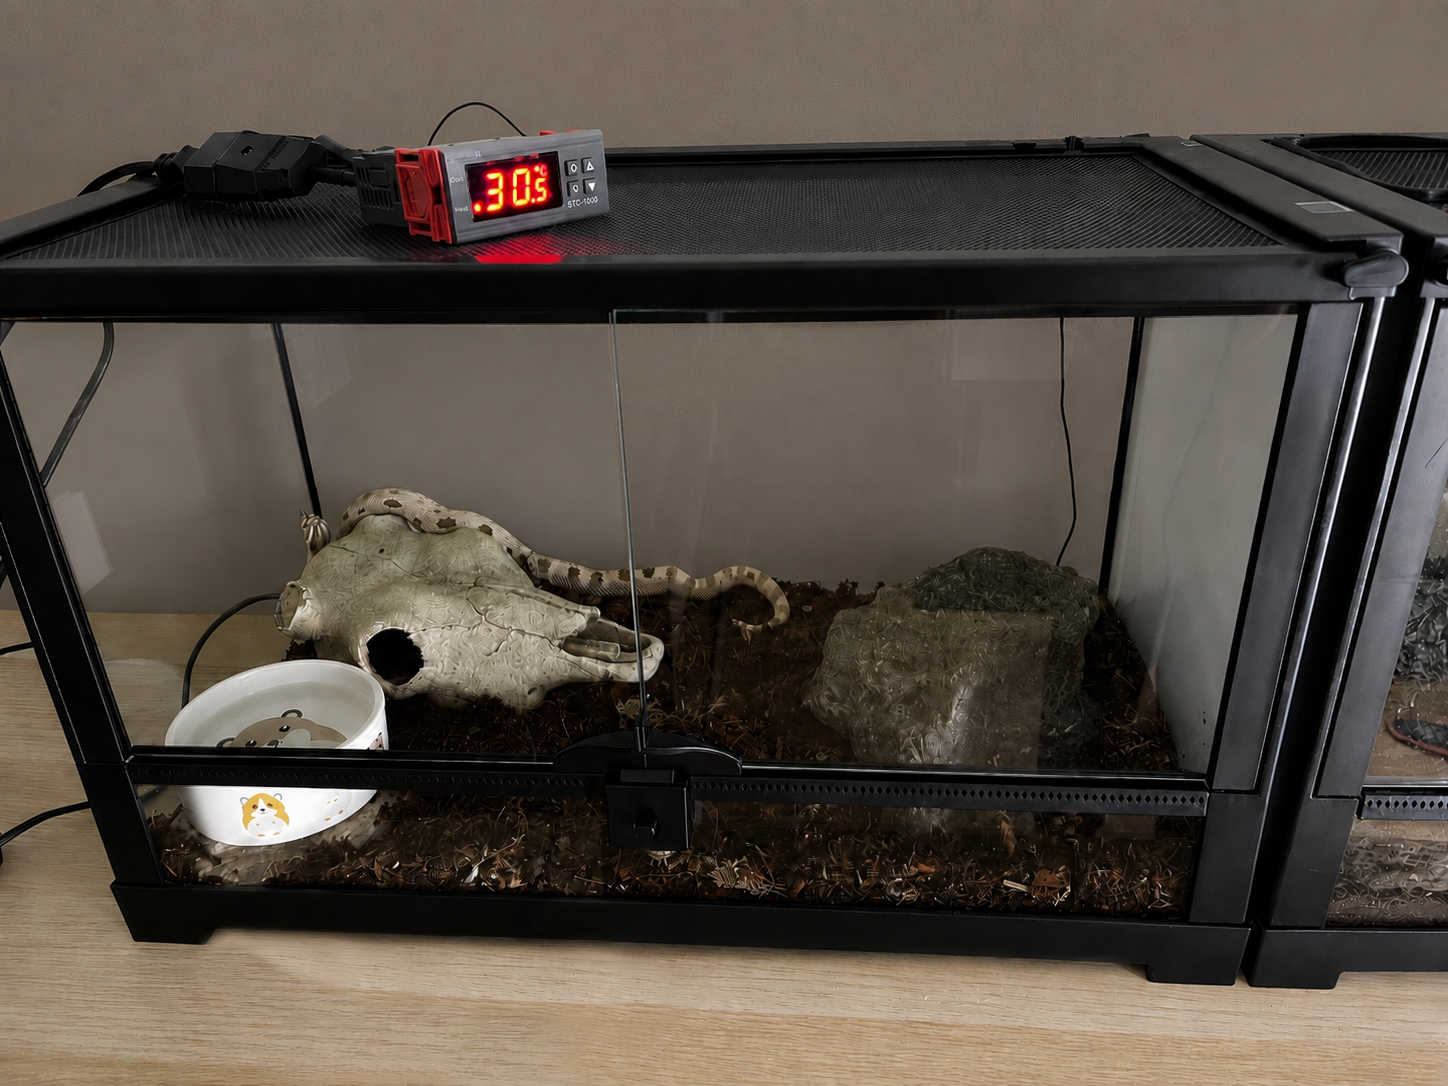
Aideepen Digital Temperature Controller STC-1000 DC 12V 10A — approx. €12
Every heat source needs a thermostat. This one is simple, reliable, and inexpensive. It comes with a probe that you place inside the enclosure over the heat mat. This reads the actual surface temperature and tells the thermostat when to turn the mat on and off.
Connecting the heat mat to the thermostat requires basic electrical knowledge. You have to wire the mat to the controller output. It's not complicated, but if you're not comfortable with basic wiring, ask someone who is. Done incorrectly it's a safety issue.
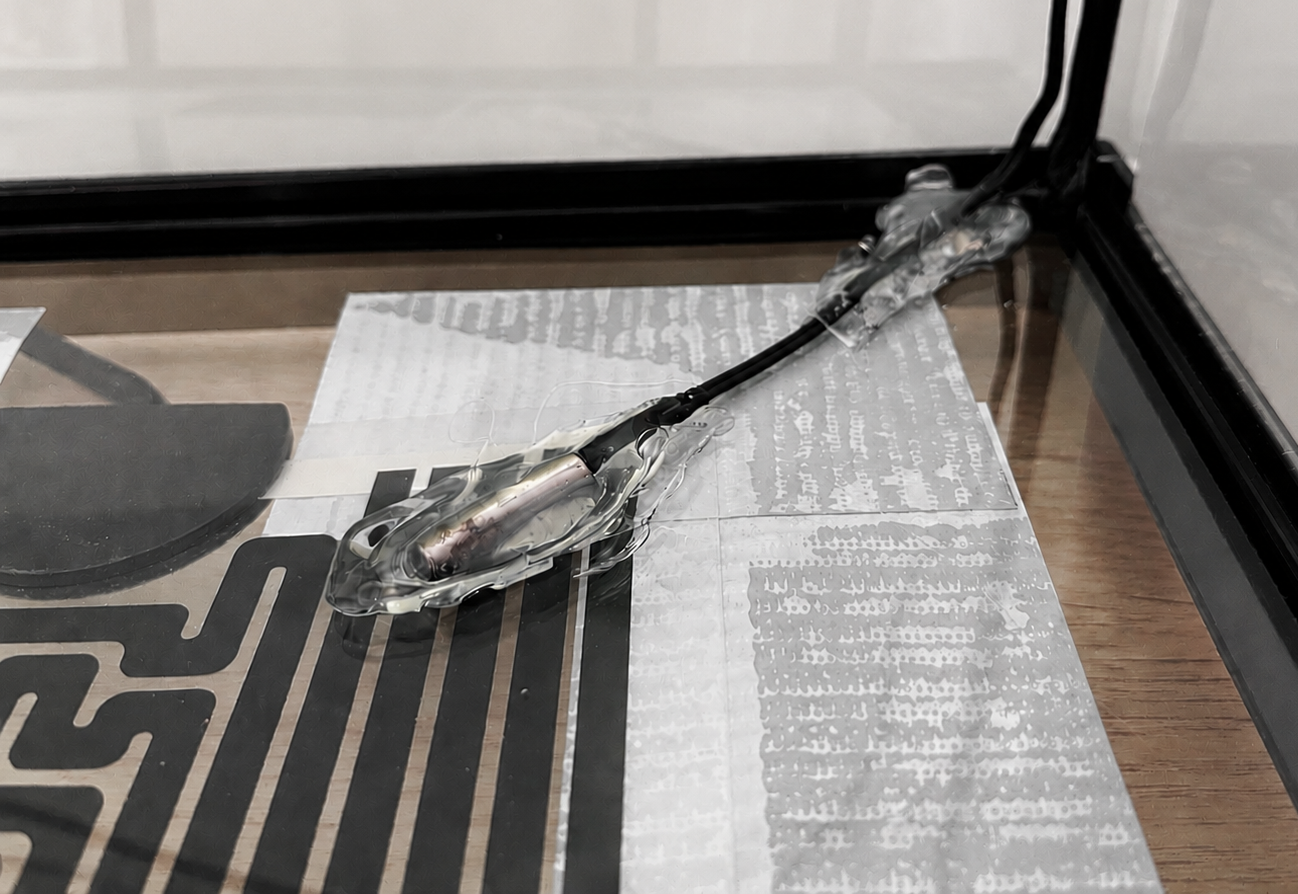
Important note on the probe: once positioned over the heat mat, secure it firmly with hot glue. Snakes are curious and will investigate anything in their enclosure. They will find the probe, dig under it, and move it. A probe that's been shifted from its position gives you inaccurate readings, which means your temperature control is no longer working correctly. Hot glue is the most reliable solution.
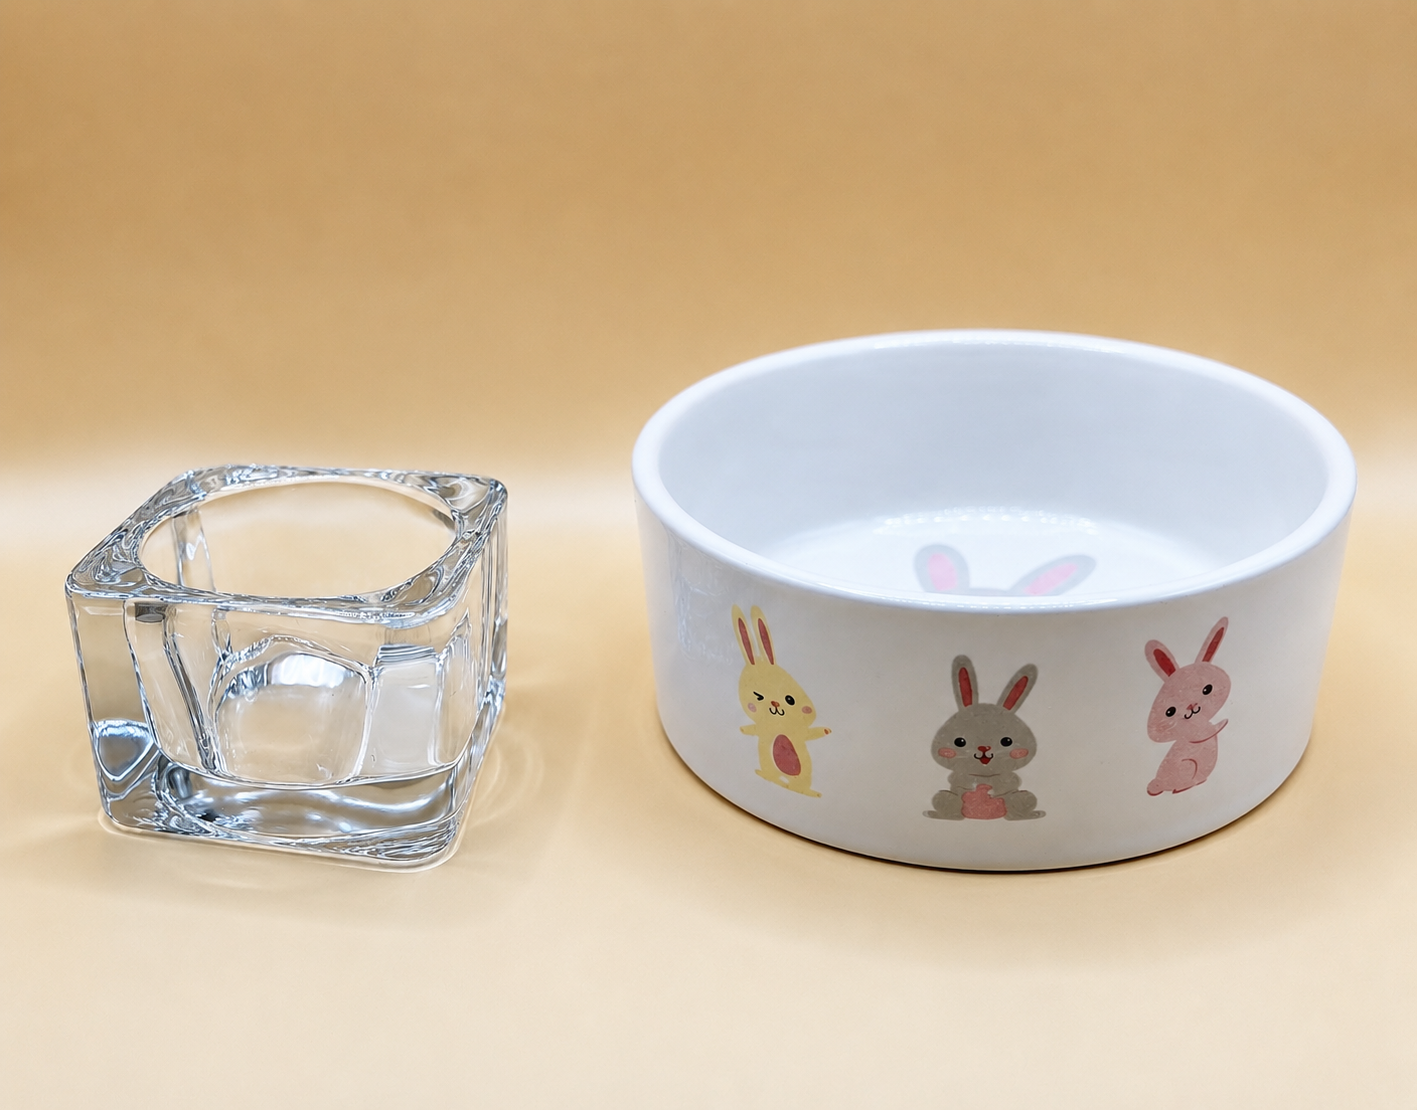
IKEA FINSMAK Tealight holder — approx. €0.35
or Ceramic Pet Bowl — approx. €1.50
This is one of those solutions that sounds unlikely until you try it. The FINSMAK is a small, shallow, heavy glass holder that sits stably on the substrate, holds just enough water for a small snake without being deep enough to be a drowning risk, and costs almost nothing. It's genuinely the best water vessel for hatchlings and small juveniles we've found. Pick up a handful next time you're near an IKEA.
For the larger Exo Terra setup, the FINSMAK works but starts to feel a little small relative to the enclosure size. A better fit is a small ceramic pet bowl, the kind sold for rabbits or guinea pigs. They're slightly deeper, a little wider, look neat in the enclosure, and cost around €1.50 if you find them in a general homeware or discount store. Pet shops stock the same thing for around €5, so it's worth looking elsewhere first. The low, wide shape is ideal, they are stable enough that the snake won't tip it, shallow enough to be safe.
Paper towel — almost free
For hatchlings and juveniles in a tub setup, paper towel is the right choice. It's easy to replace completely when soiled, waste is immediately visible, and — importantly for small snakes — prey items offered during feeding don't pick up substrate that can get stuck to them or be accidentally ingested. Once a snake is larger and established on a reliable feeding schedule, you can transition to a more naturalistic substrate. For now, keep it simple.
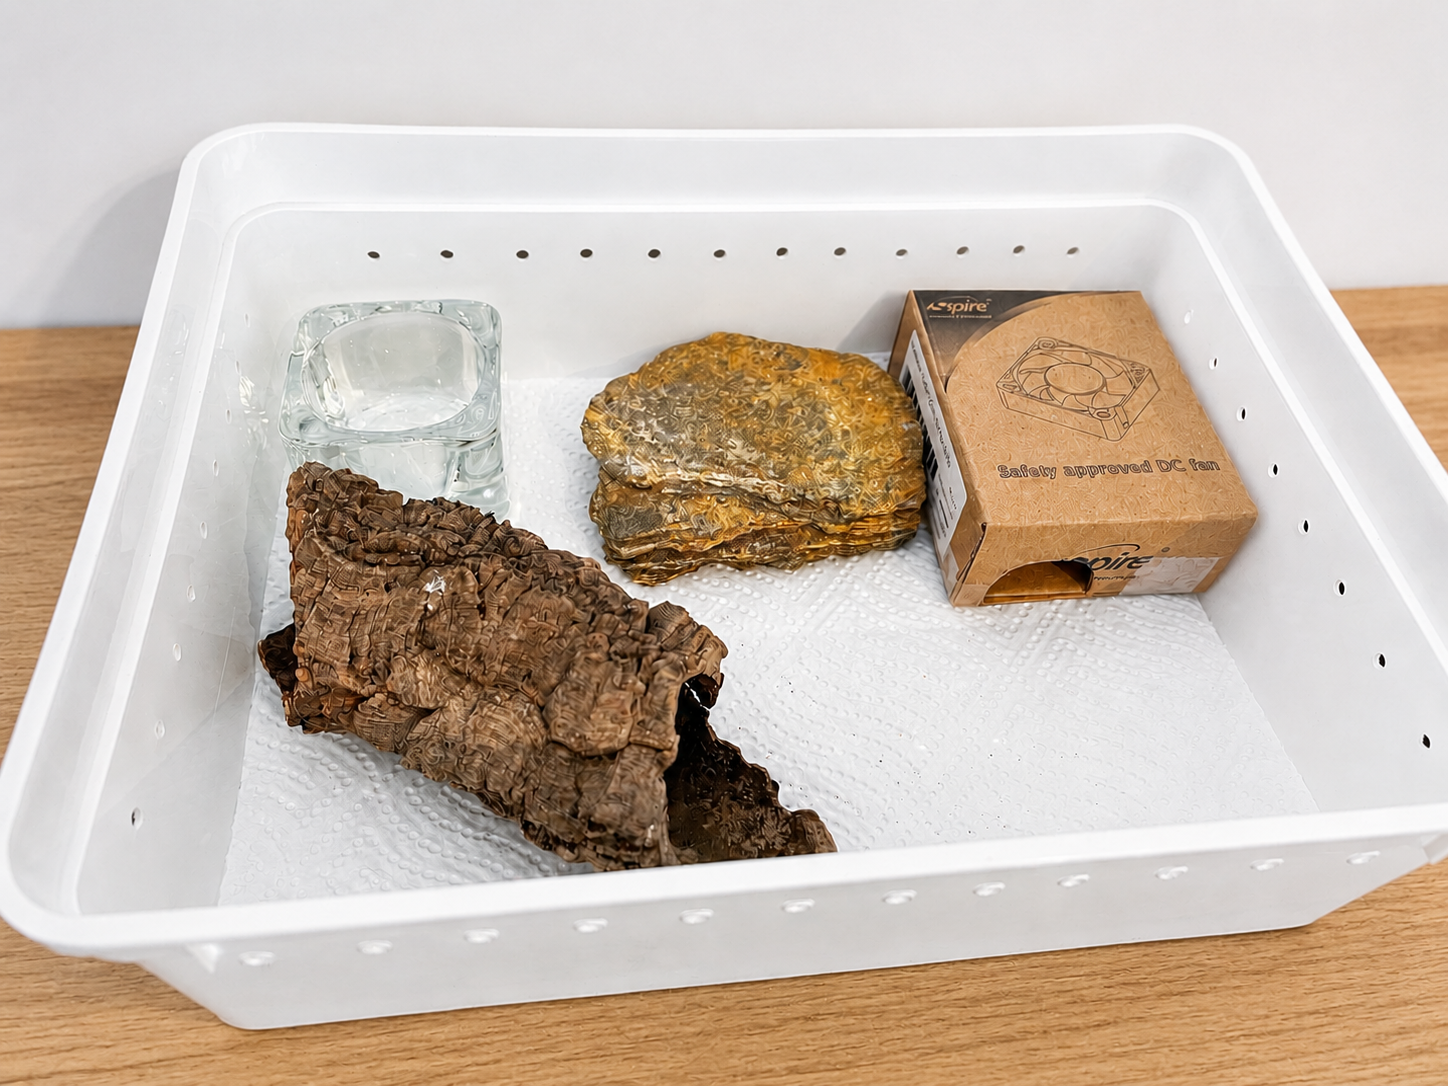
For a budget tub setup you don't need to buy hides. Toilet paper rolls and paper towel rolls work perfectly. They're the right diameter for a small snake, they're dark and enclosed, and when they get soiled you throw them away and replace them. A small plastic container from your kitchen with a hole cut in the side works equally well.
If you want to buy something, basic plastic hides start from a few euros and are fine. The snake genuinely doesn't care.
| Item | Option A (Braplast) | Option B (Exo Terra) |
|---|---|---|
| Container | €1.80 | €28 |
| Heat mat | €9 | €9 |
| Thermostat | €12 | €12 |
| Water bowl | Finsmak €0.35 | Ceramic bowl €1.50 |
| Hide (DIY) | €0 | €0 |
| Paper towel | €1 | €1 |
| Total | approx. €24 | approx. €50 |
Total cost: approximately €160-380 depending on enclosure size
Time to set up: about 1 hour
This is the setup we'd recommend to anyone starting out. Everything is commercially available, nothing requires special skills, and you can have it running correctly within an hour of getting the components together.
We use the Repto Terra Earth glass terrarium, a well made glass enclosure with front opening doors and adequate ventilation. Size depends on the snake:
If you're not sure which size you need yet, start with the juvenile size and upgrade as the snake grows. A too large enclosure can actually be counterproductive for a young snake. Too much space feels exposed and unsettling rather than enriching.
Reptile Nova Heat Mat — size depends on enclosure
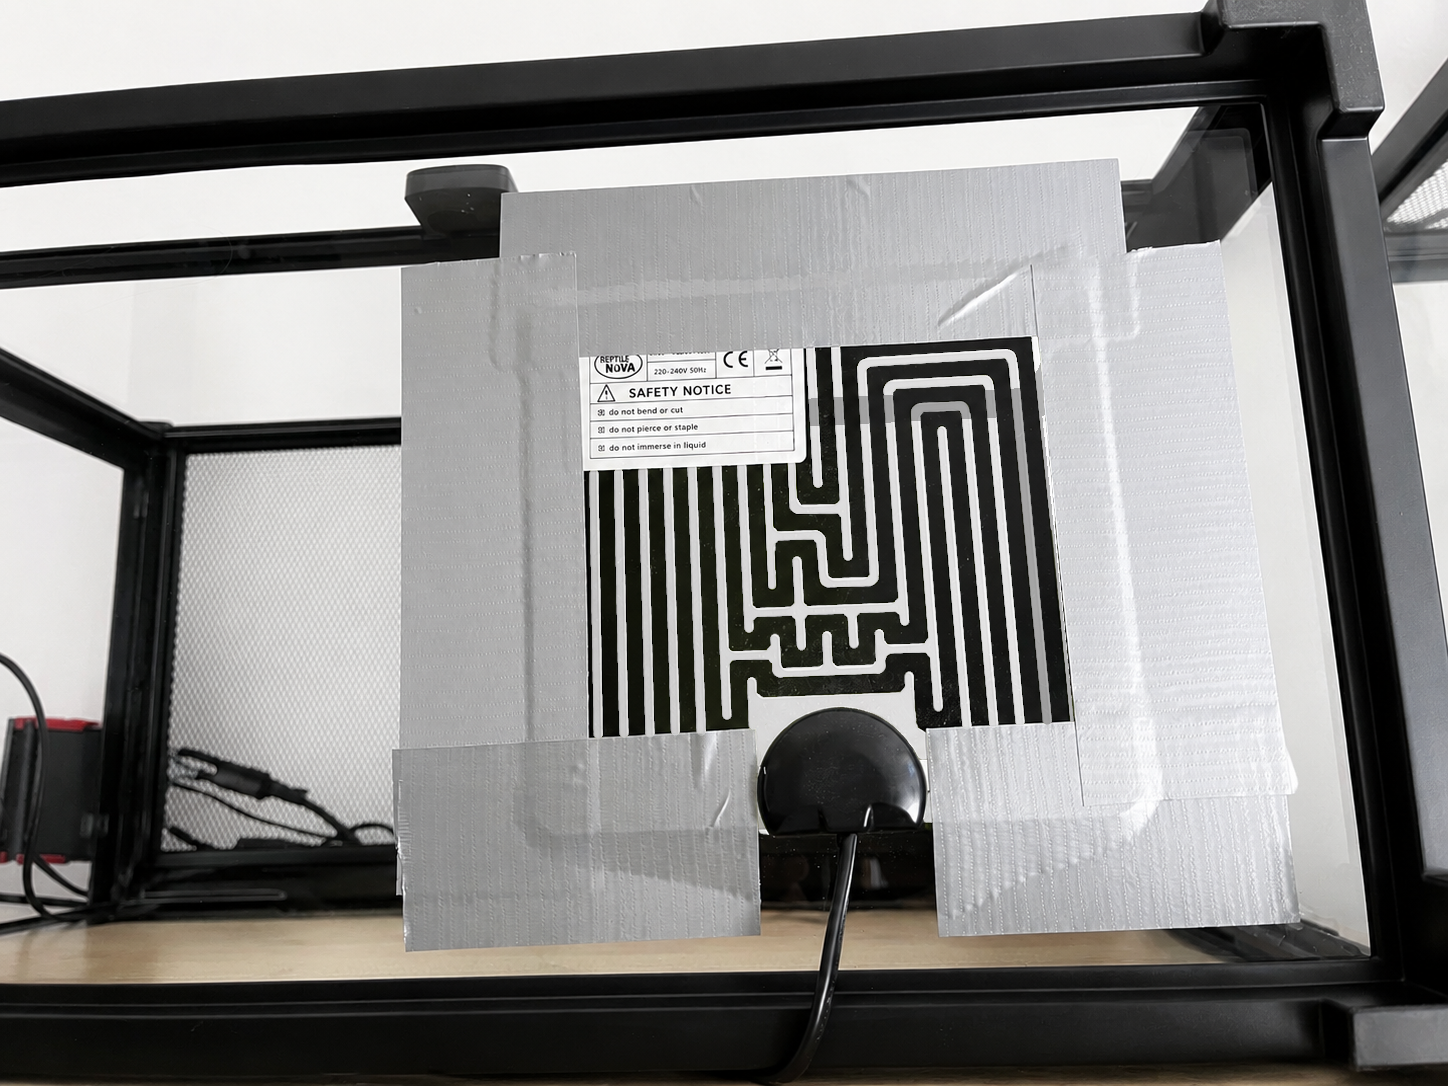
Position the mat under one end of the enclosure and secure it firmly to the underside using strong aluminium foil tape (silver tape). This keeps the mat in place and ensures consistent heat distribution across the surface. Don't skip the tape. A mat that shifts position changes your gradient and gives your thermostat probe inaccurate readings.
The 5W mat covers enough surface area for a smaller enclosure, while the 14W version covers more floor space in the larger ones. The wattage difference doesn't mean more heat. The thermostat controls the actual temperature regardless of mat size. What changes is the coverage area, making sure the warm zone extends across enough of the enclosure floor to be genuinely useful for a larger snake.
Leave the other end of the enclosure at ambient room temperature. This creates your thermal gradient naturally without any additional equipment. The snake moves between warm and cool ends to regulate its own body temperature throughout the day.
Aideepen Digital Temperature Controller STC-1000 DC 12V 10A — approx. €12
Same thermostat as the other options. Every heat source needs one. Connect the heat mat to the thermostat output, place the probe inside the tub over the warm area, and set your target temperatures. Secure the probe firmly (use hot glue or strong tape) because even small hatchlings will find it, investigate it, and move it if it isn't fixed in place.
Basic electrical knowledge is needed to wire the mat to the thermostat. If you're not comfortable with this, ask someone who is.
GHome Smart Socket 16A WiFi — approx. €30 for a pack of 4
We use one smart socket per thermostat setup. This lets you control power remotely via app, set schedules, and monitor usage. For a simple glass setup one socket is sufficient. Connected to the thermostat so you have full remote control over the heating.
We use a mix of several substrates layered together, which creates a more natural environment and holds humidity better than any single substrate alone:
Mixed together, this amount goes a long way. You'll use it across multiple enclosures and multiple refills. The initial cost looks higher than it is on a per-use basis.
If you're setting up a quarantine enclosure or want the simplest possible option, paper towel works fine and costs almost nothing. It's not enriching, but it makes monitoring waste and cleanliness straightforward.
Water bowl — anything food safe and shallow works. A basic ceramic bowl from around €1 is fine. If you want something that looks more natural, realistic resin bowls run €10-15.
Hide — at minimum one on the warm end and one on the cool end. Basic plastic hides start from a few euros. More naturalistic resin hides that look good in the enclosure run around €25. The snake doesn't care about aesthetics, but if you're going to be looking at it every day, it's worth getting something you like.
Cork bark — Dragon bark cork, 10x20cm piece, approx. €6. Gives the snake a surface to rub against during shedding and adds some visual interest to the enclosure.
Rocks — flat rocks from outside work perfectly and cost nothing. Clean them thoroughly before use. Rinse well, scrub, and either bake in the oven at low temperature or soak in diluted reptile safe disinfectant. You don't want to introduce mites, parasites, or bacteria from outside into the enclosure.
| Item | Approx. Cost |
|---|---|
| Enclosure (juvenile size) | €60 |
| Enclosure (adult male) | €110 |
| Enclosure (adult female) | €220 |
| Heat mat | €9-12 |
| Thermostat | €12 |
| Smart socket | €7.5 |
| Substrate mix | €43 |
| Water bowl | €1-15 |
| Hide (x2) | €10-50 |
| Cork bark | €6 |
| Total (juvenile setup) | approx. €165 |
| Total (adult female setup) | approx. €378 |
Substrate costs spread across multiple refills — actual per-setup cost is lower.
Total cost: approximately €530+ per enclosure
Time to set up: approximately 3 working days plus 6 days drying time
This is the setup we're most proud of. It takes considerably more time, more planning, and more money than the glass option, but the result is an enclosure that looks like a piece of furniture, functions better than most commercial options, and gives you complete control over every detail of the environment.
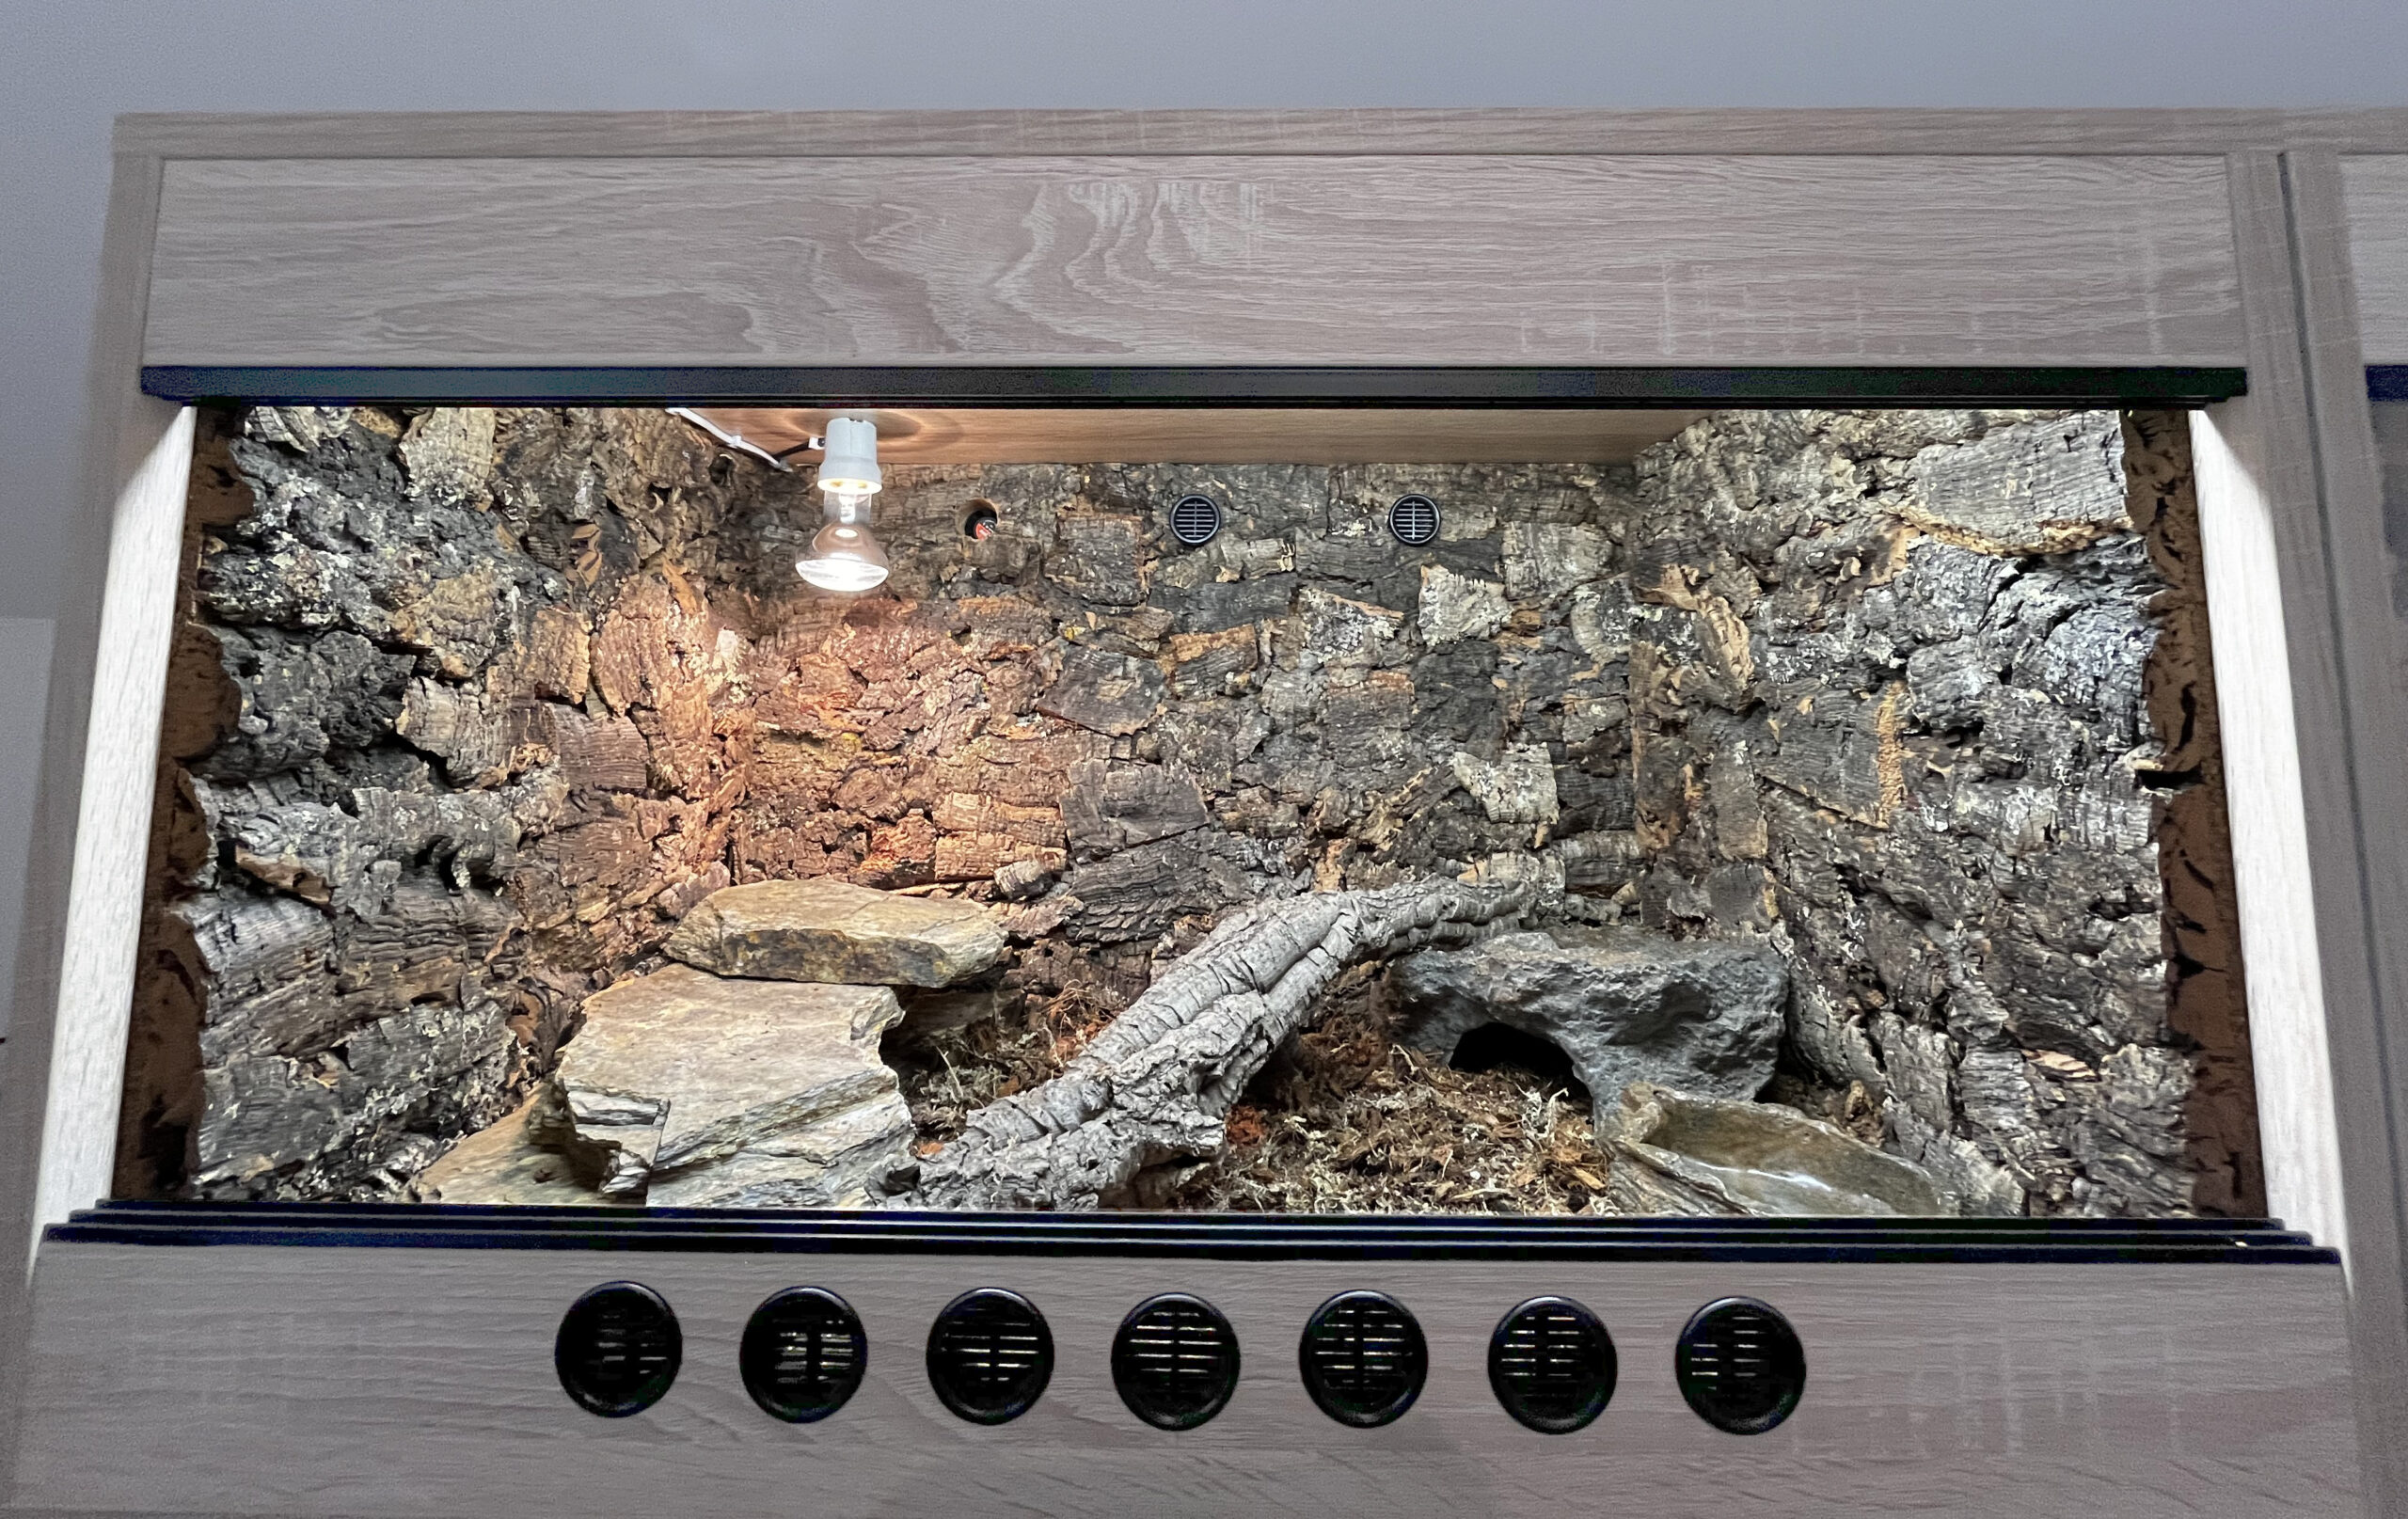
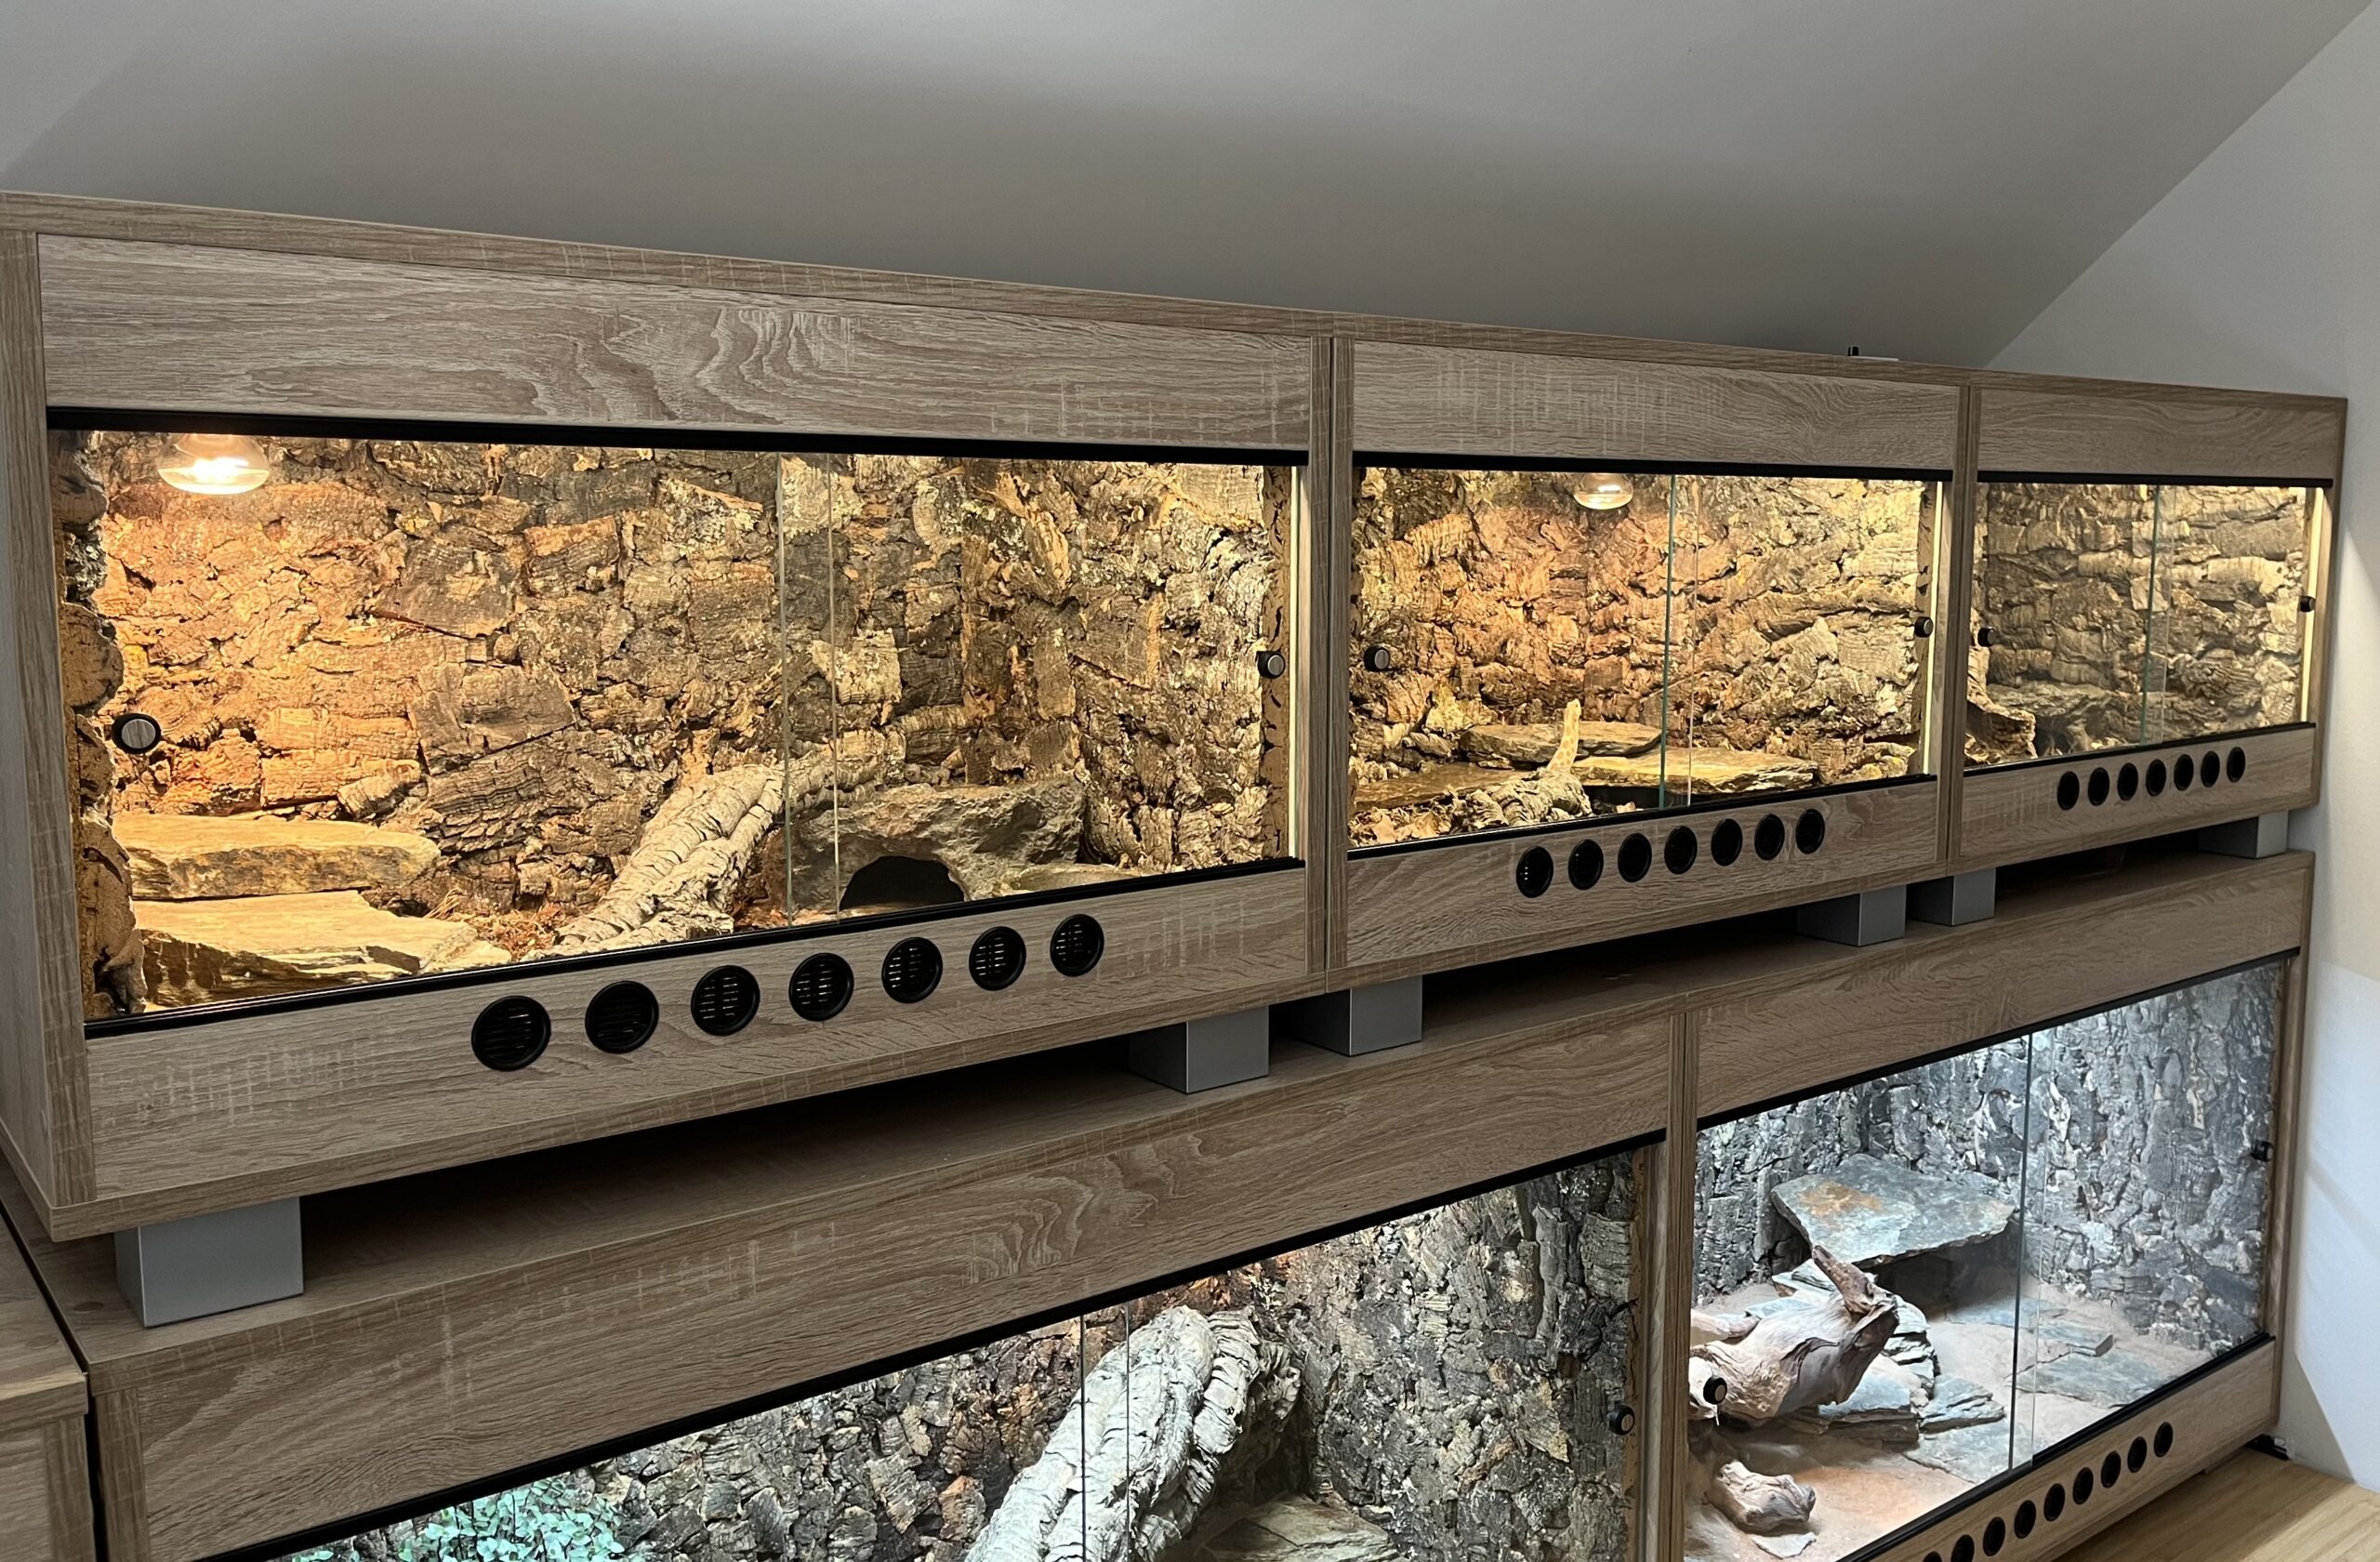
Custom built from oak veneered particle board, 100x50x50cm with two front glass panels — approx. €200
We had these built to our specifications. The material is oak veneered chipboard. Durable, looks excellent, and holds up well to the humidity that comes with keeping reptiles. Each enclosure has two front opening glass panels for easy access.
Ventilation is built into the design: 7 holes at the front bottom and 3 at the back top. This creates natural airflow (cool air enters at the bottom, warm air exits at the top). Getting ventilation right in a wooden enclosure matters more than in glass because wood doesn't self regulate humidity the way glass does.
Stands — 4 PVC feet, 5cm height each, approx. €4.50 each (€18 total). These lift the enclosure slightly off the surface, improve airflow underneath, and protect the floor.
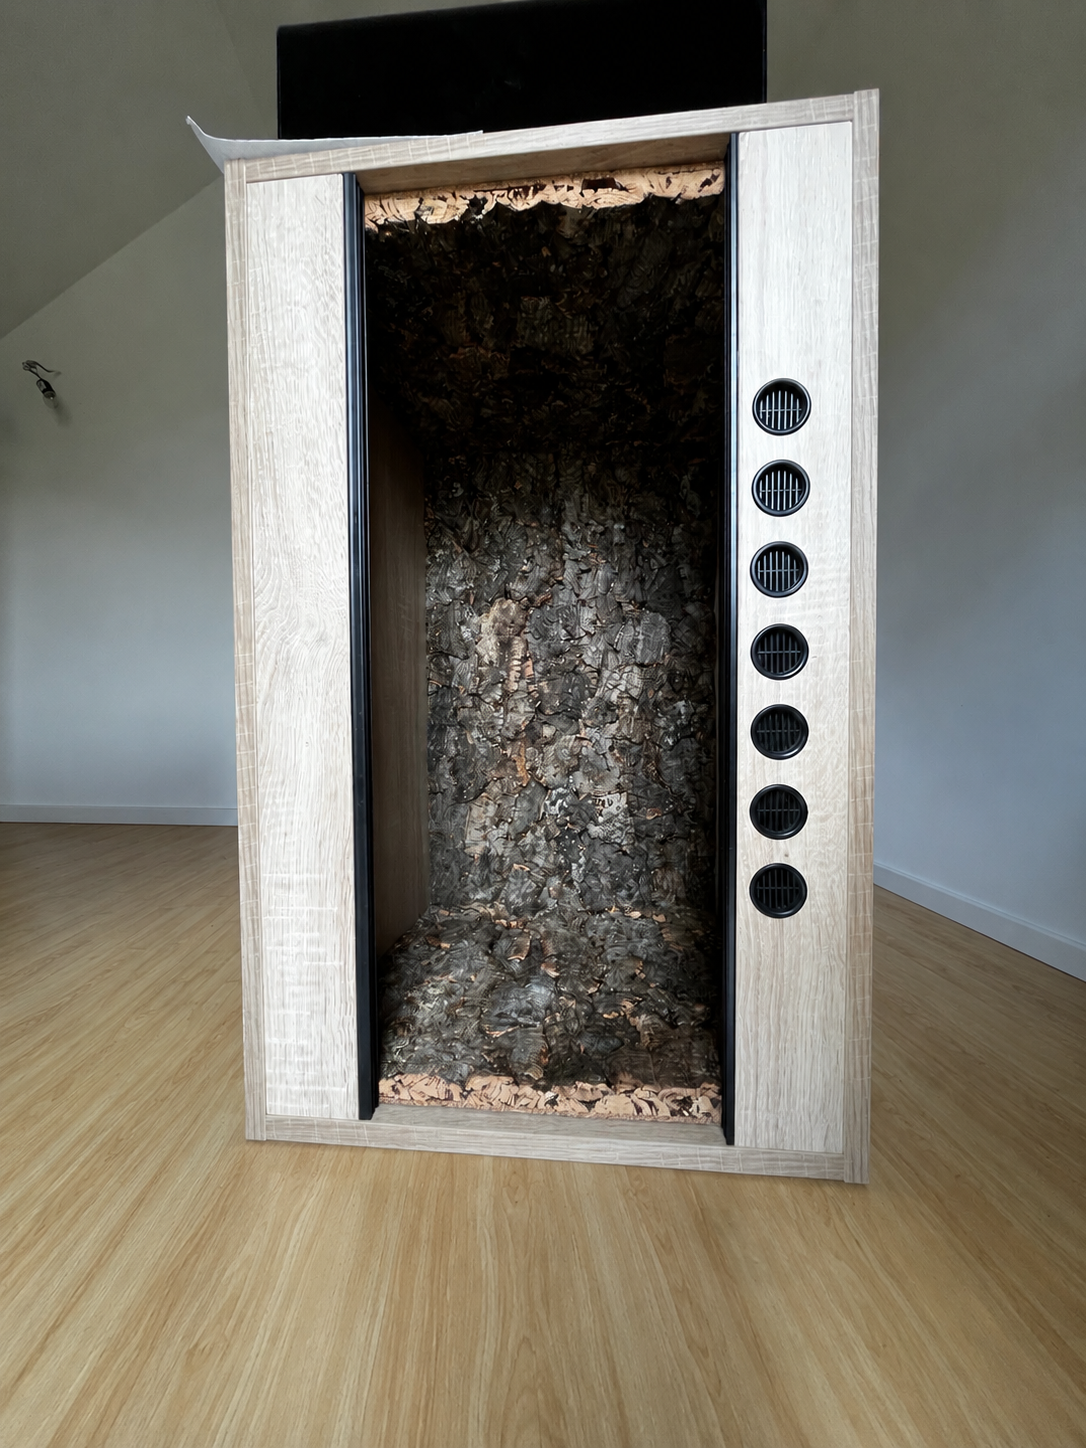
Dragon 3D Cork Plate — approx. €80 each, 2 needed per enclosure (€160 total)
The cork plate covers the back and both side walls, creating a fully naturalistic interior. It's genuinely beautiful and the snakes use it. They explore the texture, press against it and it provides visual cover that makes them feel more secure.
Installation process: Mount using assembly glue, one panel at a time. Place the back panel first, press firmly, and weigh it down with heavy objects. Leave to dry for 2 days before moving on to the side panels — one side, 2 days drying, then the other side. This takes patience. Rushing the drying time means panels that don't adhere properly and eventually come away from the wall.
Once all panels are dry and firmly set, cut the holes for the rear ventilation openings. We did this after mounting rather than before. It's easier to get precise placement once the panel is in position.
Total drying time: 6 days. You cannot rush this part.
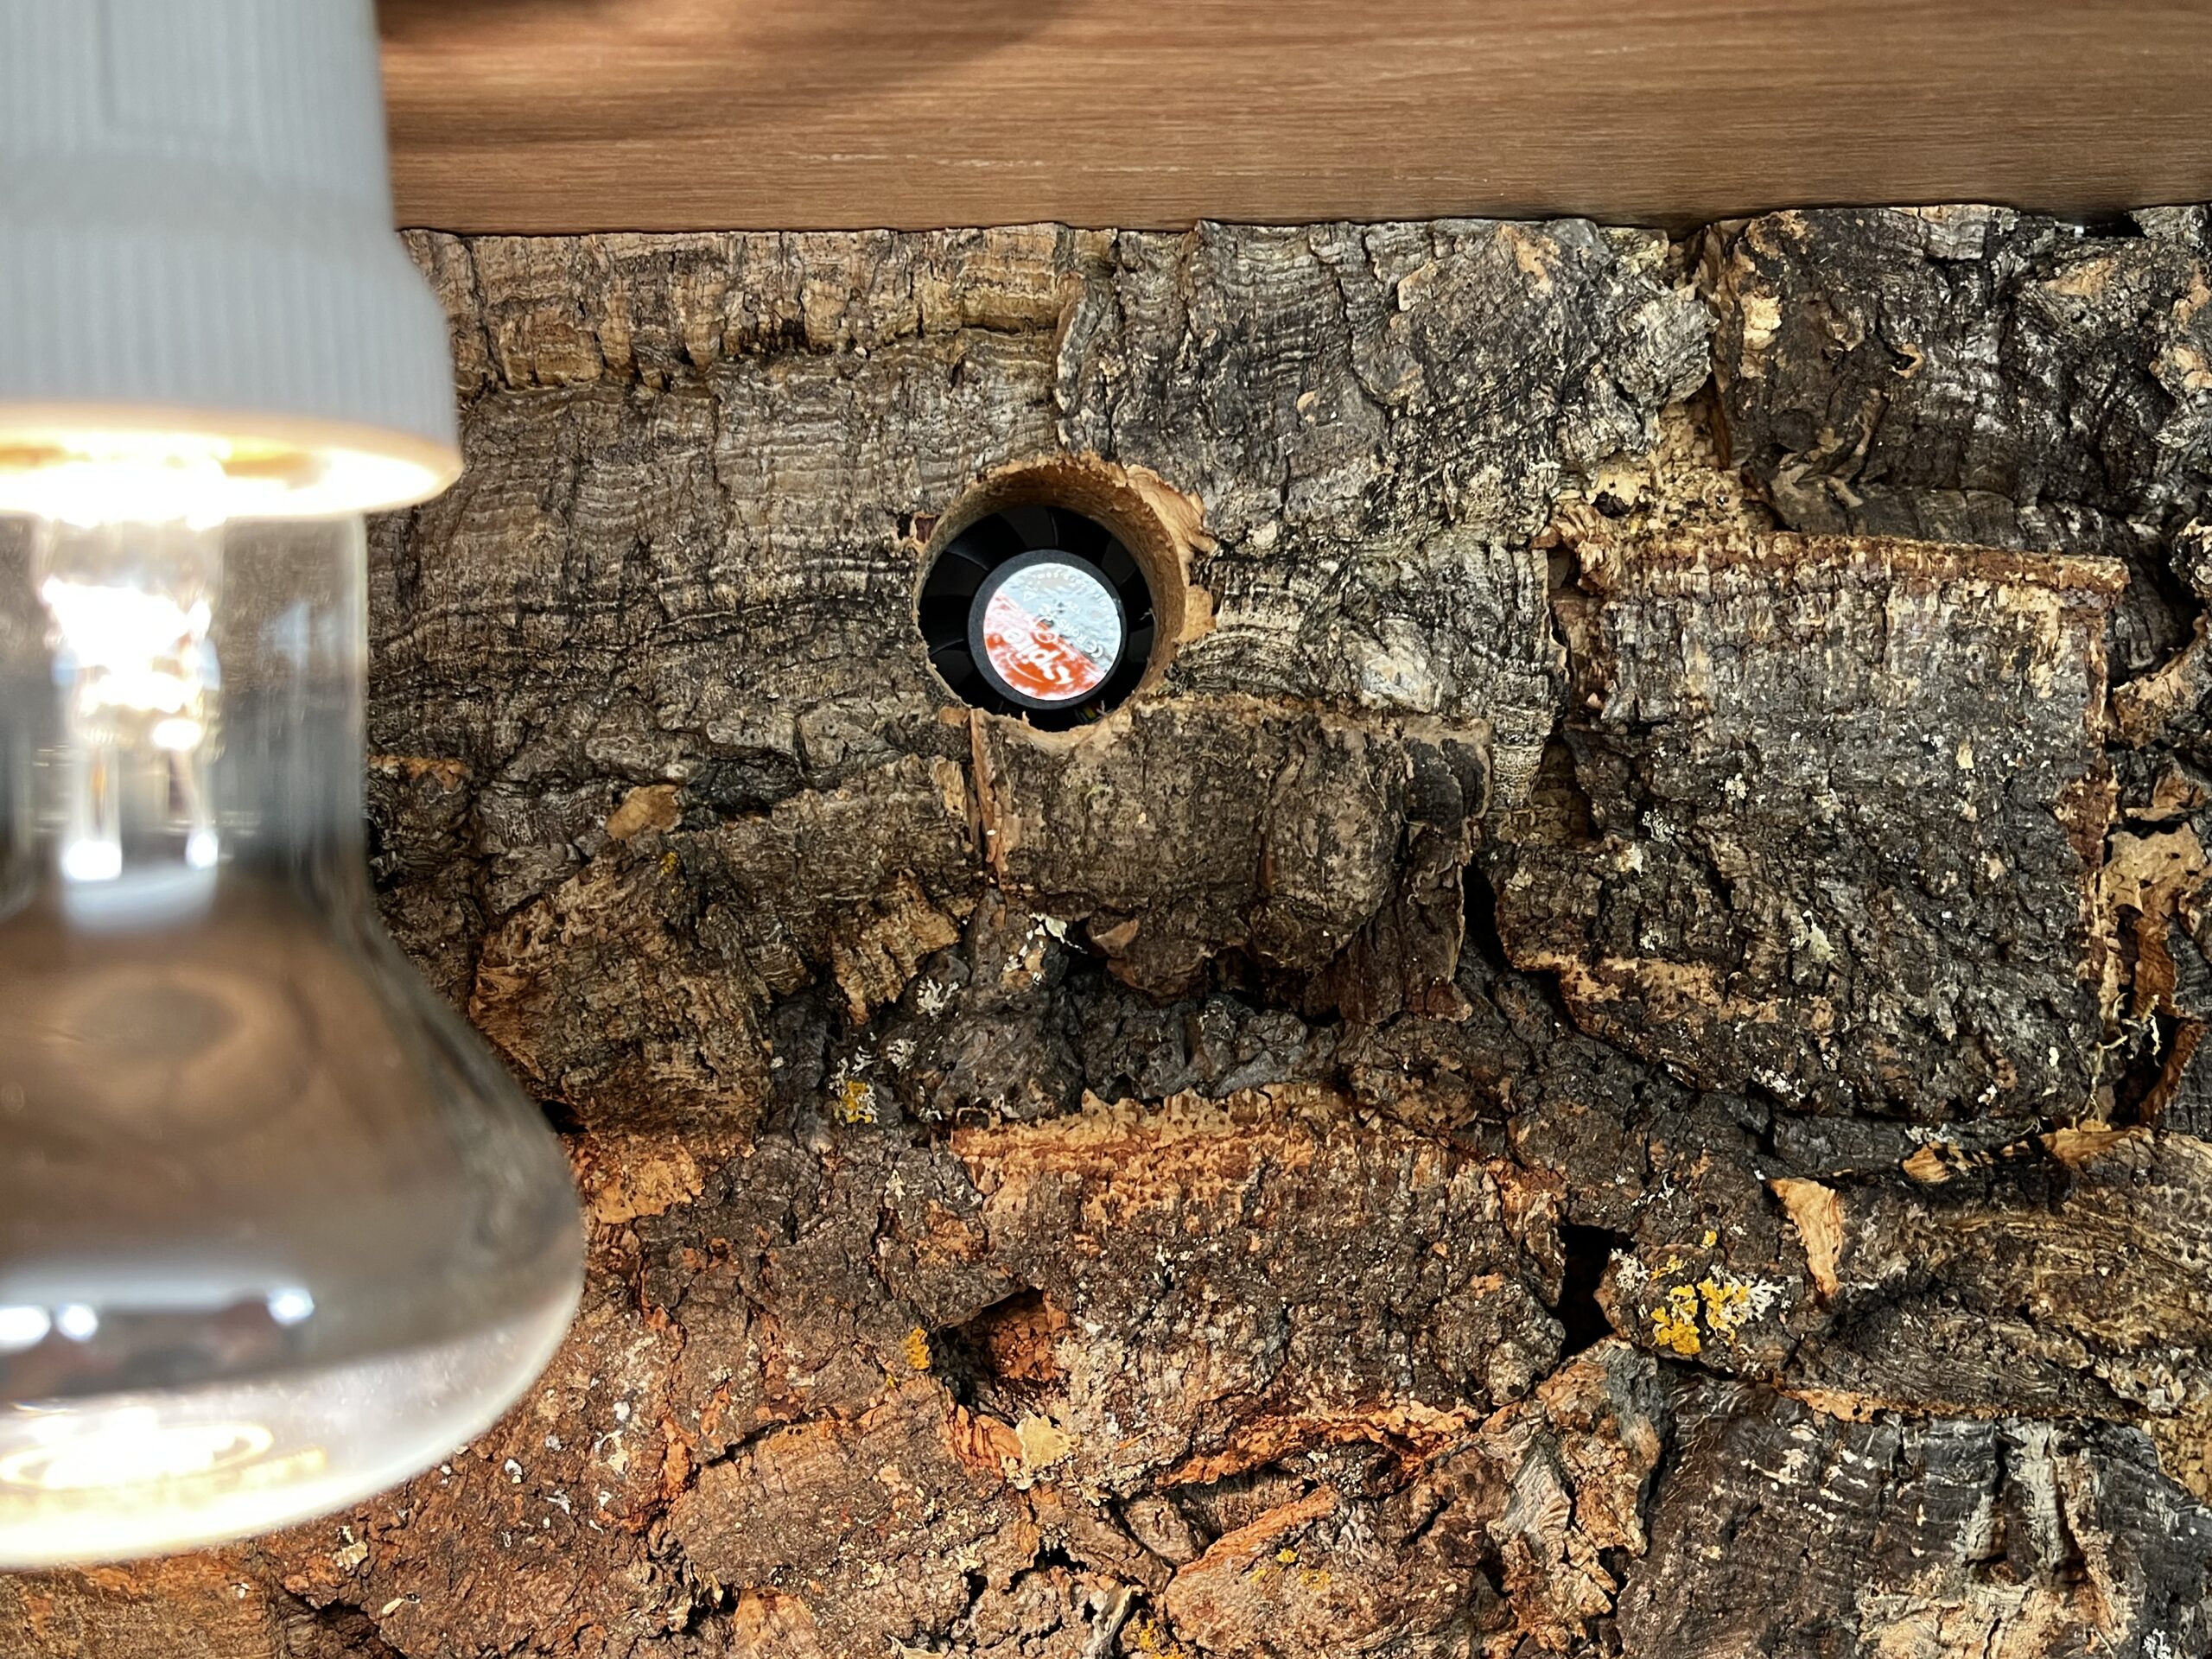
1 small PC fan mounted at the back top of the enclosure — approx. €5
Positioned on one of the rear ventilation holes, the fan actively draws warm air out of the enclosure. This keeps air circulating rather than becoming stagnant and helps maintain consistent temperatures throughout the enclosure rather than having hot and cold spots.
Fdit PC Fan Controller, 4-channel speed controller — approx. €20
This controls how fast the fan spins, which in turn controls how aggressively it pulls warm air out. In summer when ambient temperatures are higher you can run it faster; in winter slower. Having this control makes a real difference to temperature management across seasons.
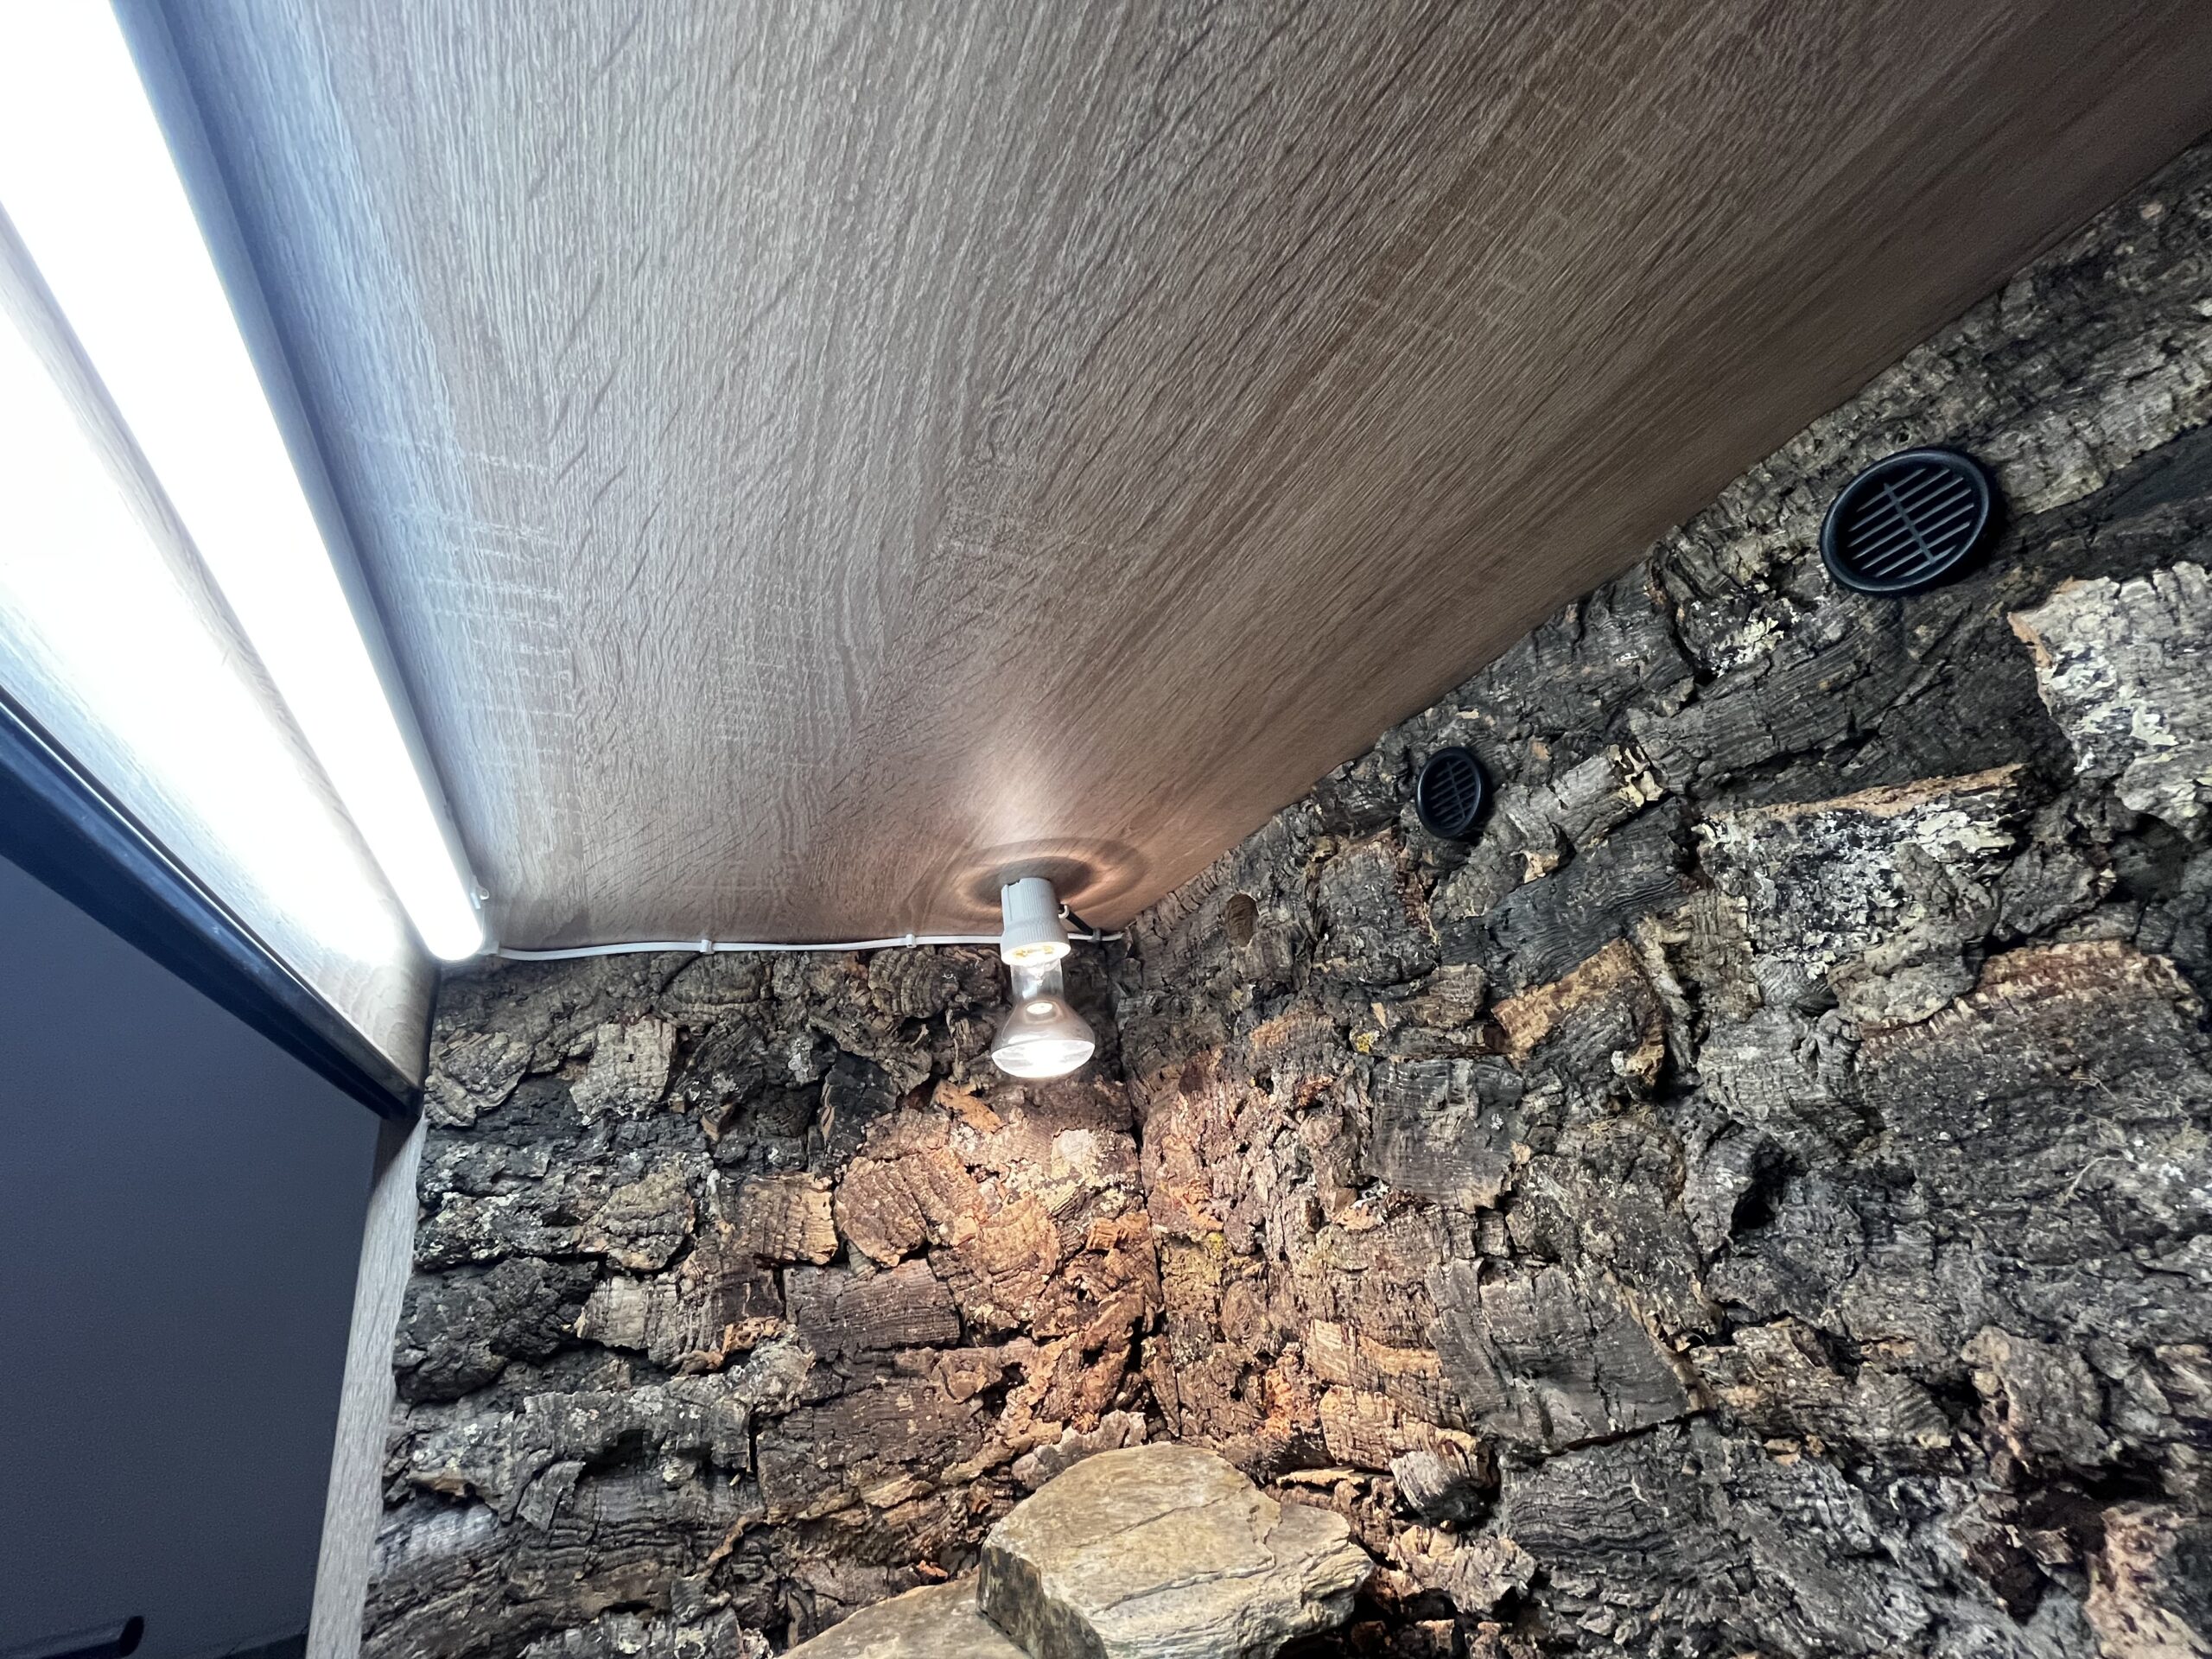
The heat bulb provides the basking spot and primary heat source. The LED strip provides full terrarium illumination for when you want to show the enclosure off. It looks spectacular with everything lit up. In day-to-day use we run only the heat bulb, keeping the rest of the interior naturally darker, which the snakes prefer.
Both are mounted inside the enclosure with cables routed through drilled holes so nothing is visible from the front during normal use. Planning the cable routing before drilling is worth doing carefully. You want clean results and you can't un-drill a hole.
HabiStat Dimming Thermostat — approx. €70
For a heat bulb setup, a dimming thermostat is the correct choice rather than an on/off thermostat. A dimming thermostat regulates temperature by adjusting the brightness of the bulb. It dims down when the target temperature is reached rather than switching the bulb on and off repeatedly. This is gentler on the bulb, produces more stable temperatures, and more closely replicates the gradual warming of natural sunlight.
The thermostat probe goes into the enclosure at the hotspot, on the exact location where the snake will bask. We drilled a small hole at this position and routed the cable so only the probe end is visible inside, with everything else hidden behind the terrarium.
GHome Smart Socket 16A WiFi — 2 sockets needed (approx. €15)
For the custom setup we use two smart sockets, one for the heat bulb and one for the ventilation fan. This lets us control them independently, set different schedules, and monitor each one separately through the app.
This is where the custom vivarium really earns its name. The interior is designed rather than just assembled.
Slate rock — approx. €3 per m², 1-2m² needed
We used slate to build a raised platform on the warm side of the enclosure. A basking ledge positioned directly under the heat bulb, sized for the snake to coil on comfortably. On the same side, we shaped the rocks to create natural looking hides beneath the platform. Enclosed spaces the snake can retreat into while remaining on the warm side.
Critical safety note: every rock must be glued in place. We used appropriate stone adhesive to bond all pieces together and to the base of the enclosure. A snake will investigate every surface and will push against rocks, wedge itself into gaps, and apply surprising force when it wants to move somewhere. Unglued rocks can shift and trap or crush a snake. Glue everything, and allow full drying time before introducing the snake.
Dragon Natural Looking Hide Large, 25x22x10cm — approx. €22.80
Placed on the cool side for contrast with the slate warm side hides. Having visually different hides on each end makes it easier to observe which the snake is choosing and helps you understand their thermoregulatory behavior.
Dragon Water Bowl Large, 1000ml, 23x18x6.5cm — approx. €19.80
Sized appropriately for an adult snake. Position on the cool side of the enclosure.
Dragon Bark Cork, 50cm piece — approx. €10.90
Adds climbing opportunity and additional shelter. Snakes use cork bark naturally, it's a texture they investigate and press against, and it gives the enclosure a more layered, three dimensional quality.
Substrate — same mix as the glass terrarium setup.
| Item | Approx. Cost |
|---|---|
| Custom enclosure (100x50x50cm) | €200 |
| Stands (x4) | €18 |
| 3D cork plate background (x2) | €160 |
| PC fan | €5 |
| Fan controller | €20 |
| Ceramic lamp holder | €2.70 |
| Cables with plugs (x2) | €10 |
| Heat bulb | €5 |
| LED light strip | €12.70 |
| Dimming thermostat | €70 |
| Smart sockets (x2) | €15 |
| Slate rock | €6-9 |
| Natural hide | €22.80 |
| Water bowl | €19.80 |
| Cork bark | €10.90 |
| Substrate mix | €43 |
| Total | approx. €650 |
Does not include tools, adhesives, or drill equipment if not already owned.
Choose the plastic tub if: You're setting up for a hatchling or juvenile, you want the most affordable starting point, or you're not yet sure how invested you'll become in the hobby. It's also the right choice for quarantine setups regardless of how experienced you are.
Choose the glass terrarium if: You want something functional and good looking without a major build project. It covers every life stage with the right size, requires no special skills, and can be ready in an hour.
Choose the custom vivarium if: You're in this for the long term, you want an enclosure that's genuinely beautiful as well as functional, and you have the time, budget, and patience for a more involved build. The result is worth it, but be honest with yourself about the commitment before you start.
We tried live plants in the custom vivariums. Plants that are confirmed safe for reptiles, properly potted, positioned carefully.
They lasted about three days before the snakes had uprooted every single one.
Hognose snakes dig. Enthusiastically, persistently, and without any concern for your interior design choices. Live plants and hognoses are fundamentally incompatible unless you're running a fully established bioactive setup where the root systems are too deep and established to be easily disturbed — and even then, results vary.
Plastic succulents and artificial vines are a practical alternative. They look good, they're easy to clean, they cost €5-10 each, and the snakes can rearrange them as much as they like without damaging anything. A few well placed artificial plants genuinely improve the look of an enclosure without the ongoing battle of trying to keep live ones alive.
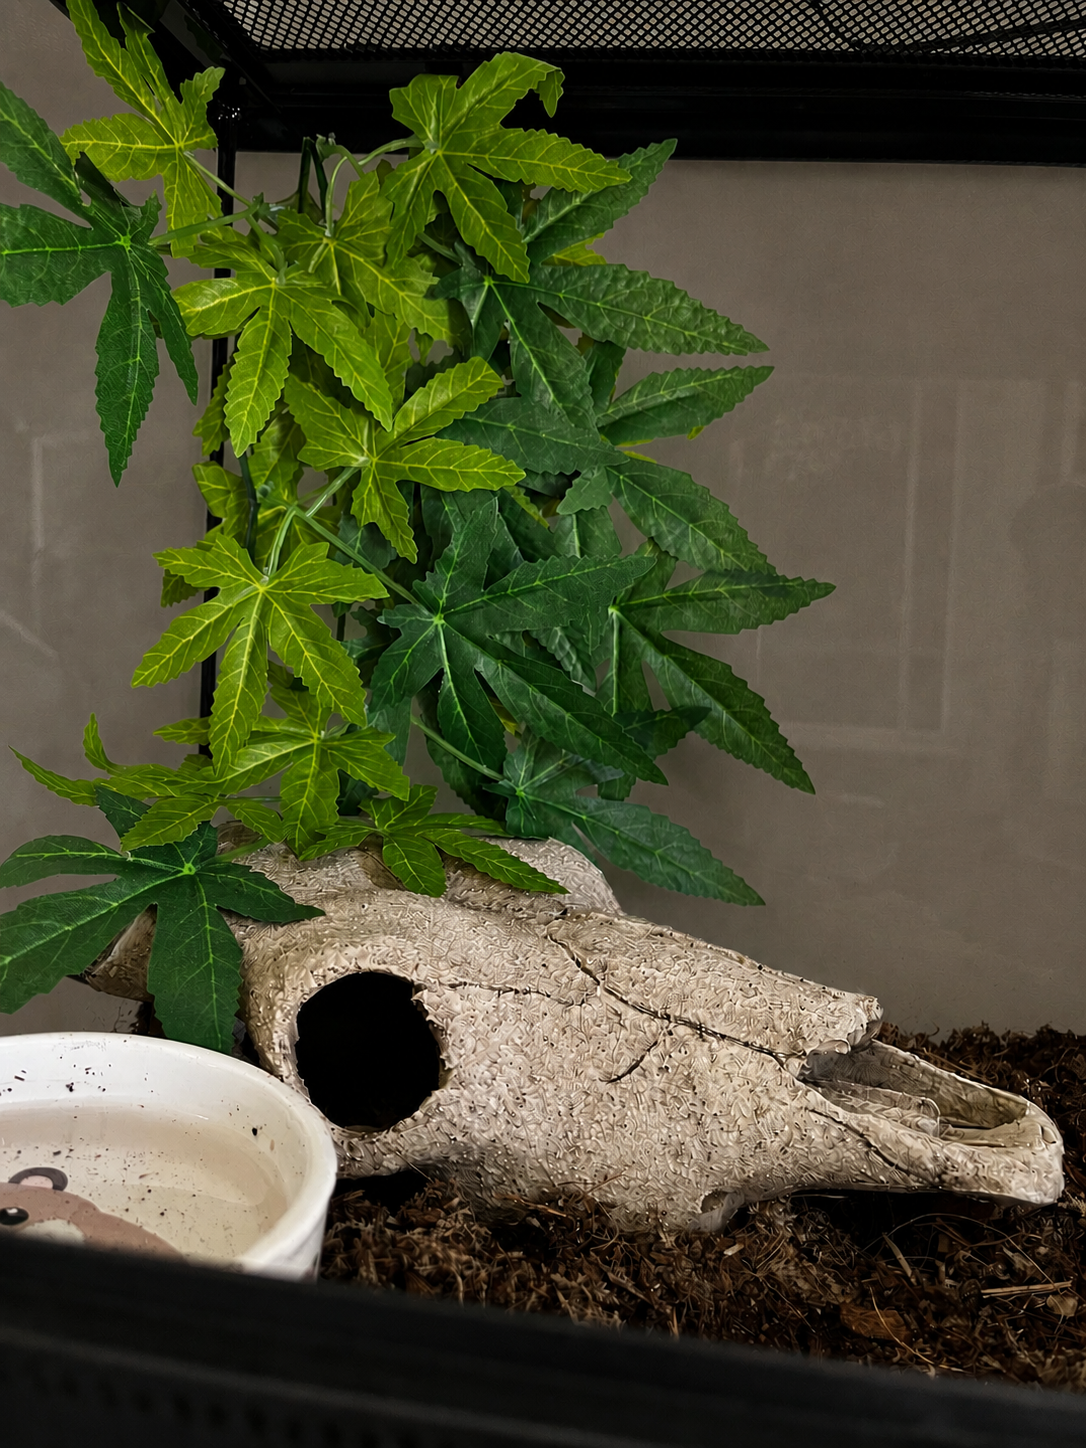
If you're making your own hides, platforms, or decorations, the materials you use matter.
Avoid:
Still unsure which setup is right for your hognose? Leave a comment below and tell us the snake's age and weight.
You must be logged in to post a comment.

No comments yet — be the first.