
Of all the things that go into a successful hognose breeding season, the lay box is probably the piece that gets the least attention in most breeding guides. It's not glamorous. It's a plastic container with some damp moss in it. But get it wrong, and a gravid female who is ready to lay may deposit her eggs in the water bowl, against the glass, or scattered across the substrate in conditions that compromise viability before you even have a chance to intervene.
Get it right, and she'll use it reliably, the eggs will be deposited in ideal conditions, and the transfer to the incubator becomes a clean, straightforward process.
It's worth getting right.
In the wild, a gravid western hognose female doesn't lay her eggs in the open. She finds a secluded, sheltered location. Typically a burrow or a space beneath ground cover, with soft, slightly moist soil that holds the right humidity and temperature to protect the eggs in their earliest hours. She's looking for darkness, security, and a substrate she can dig into and arrange around her eggs.
A lay box is a captive replication of that environment. It's a dedicated space placed inside the enclosure that gives the female the same combination of privacy, humidity, and appropriate substrate that her instincts are telling her to find. When it's done well, she'll recognize it immediately for what it is and use it without hesitation. When it's done poorly (wrong size, wrong substrate, too bright, too exposed) she may investigate it and walk away, which puts you in the position of trying to encourage a gravid snake into a space she's already decided she doesn't trust.
The lay box serves a secondary but equally important function: it keeps the eggs concentrated and protected in the right conditions from the moment they're laid until you can transfer them to the incubator. Eggs that are scattered across open substrate, sitting in incorrect humidity, or exposed to handling stress in those first hours are starting from a disadvantaged position before incubation has even begun.
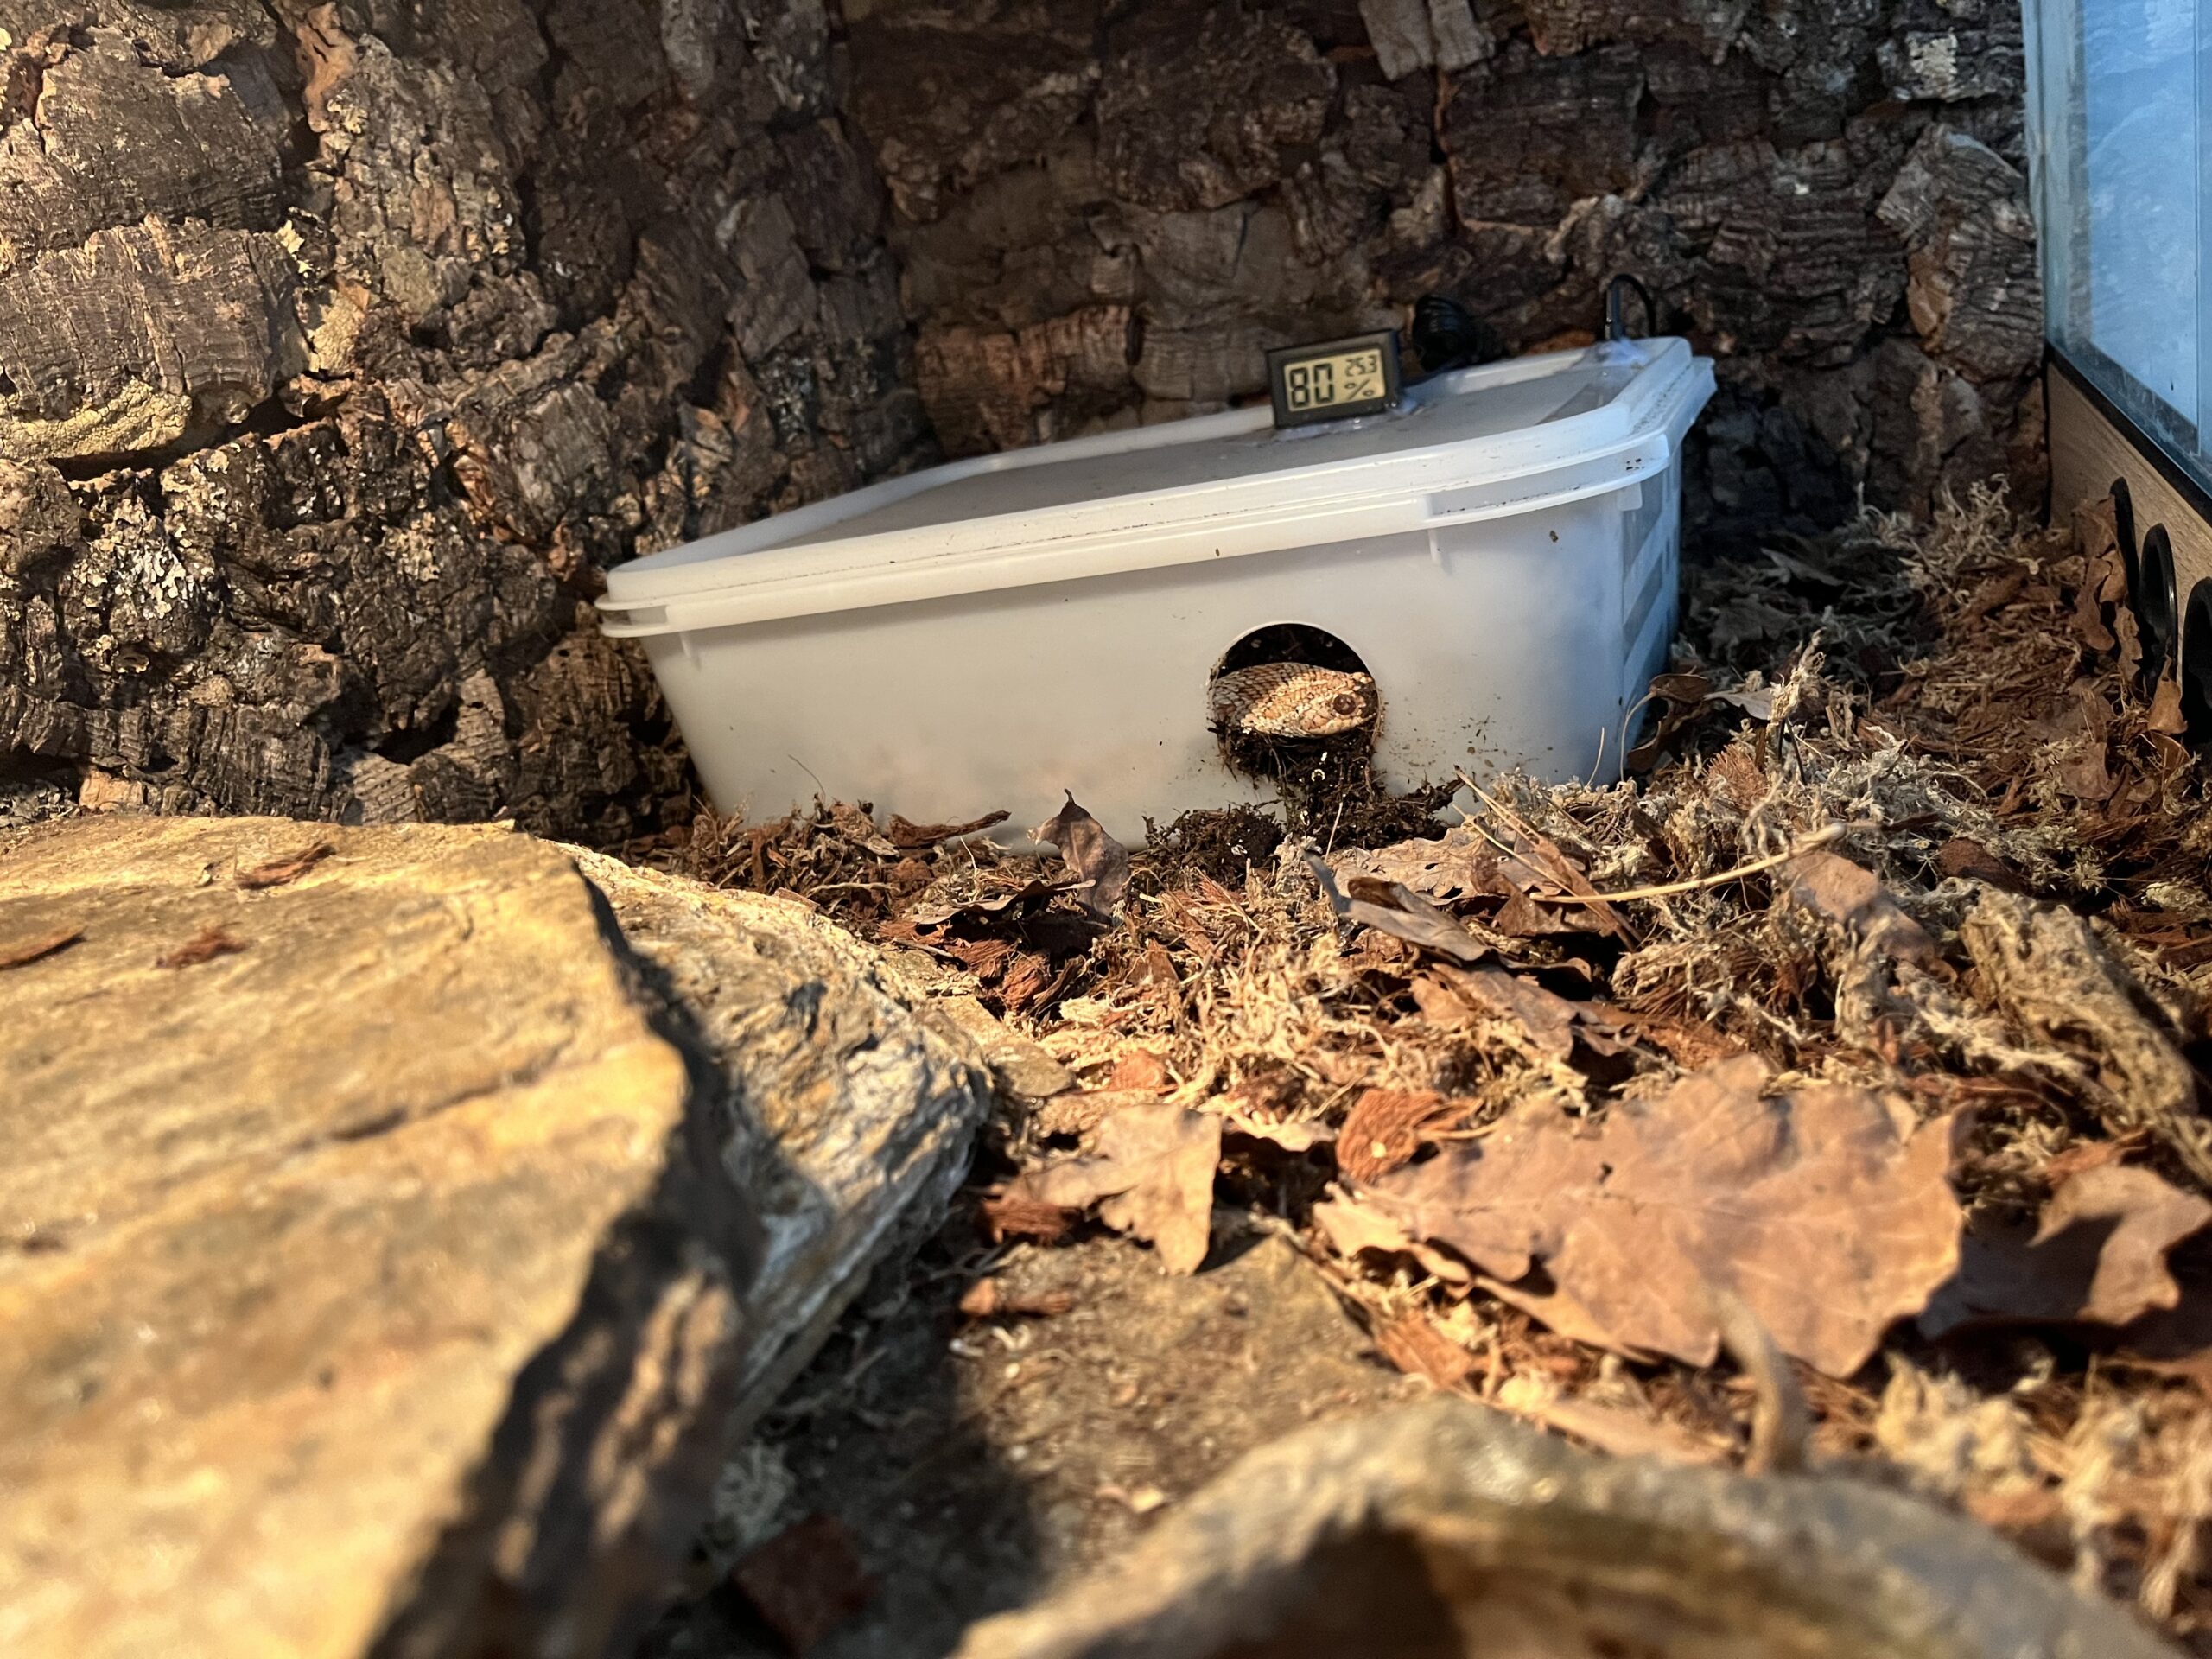
There's no single correct lay box design. Experienced breeders use a range of approaches, and what matters is that the end result meets the functional requirements rather than following a specific blueprint. Here's how we do ours, and the reasoning behind each decision.
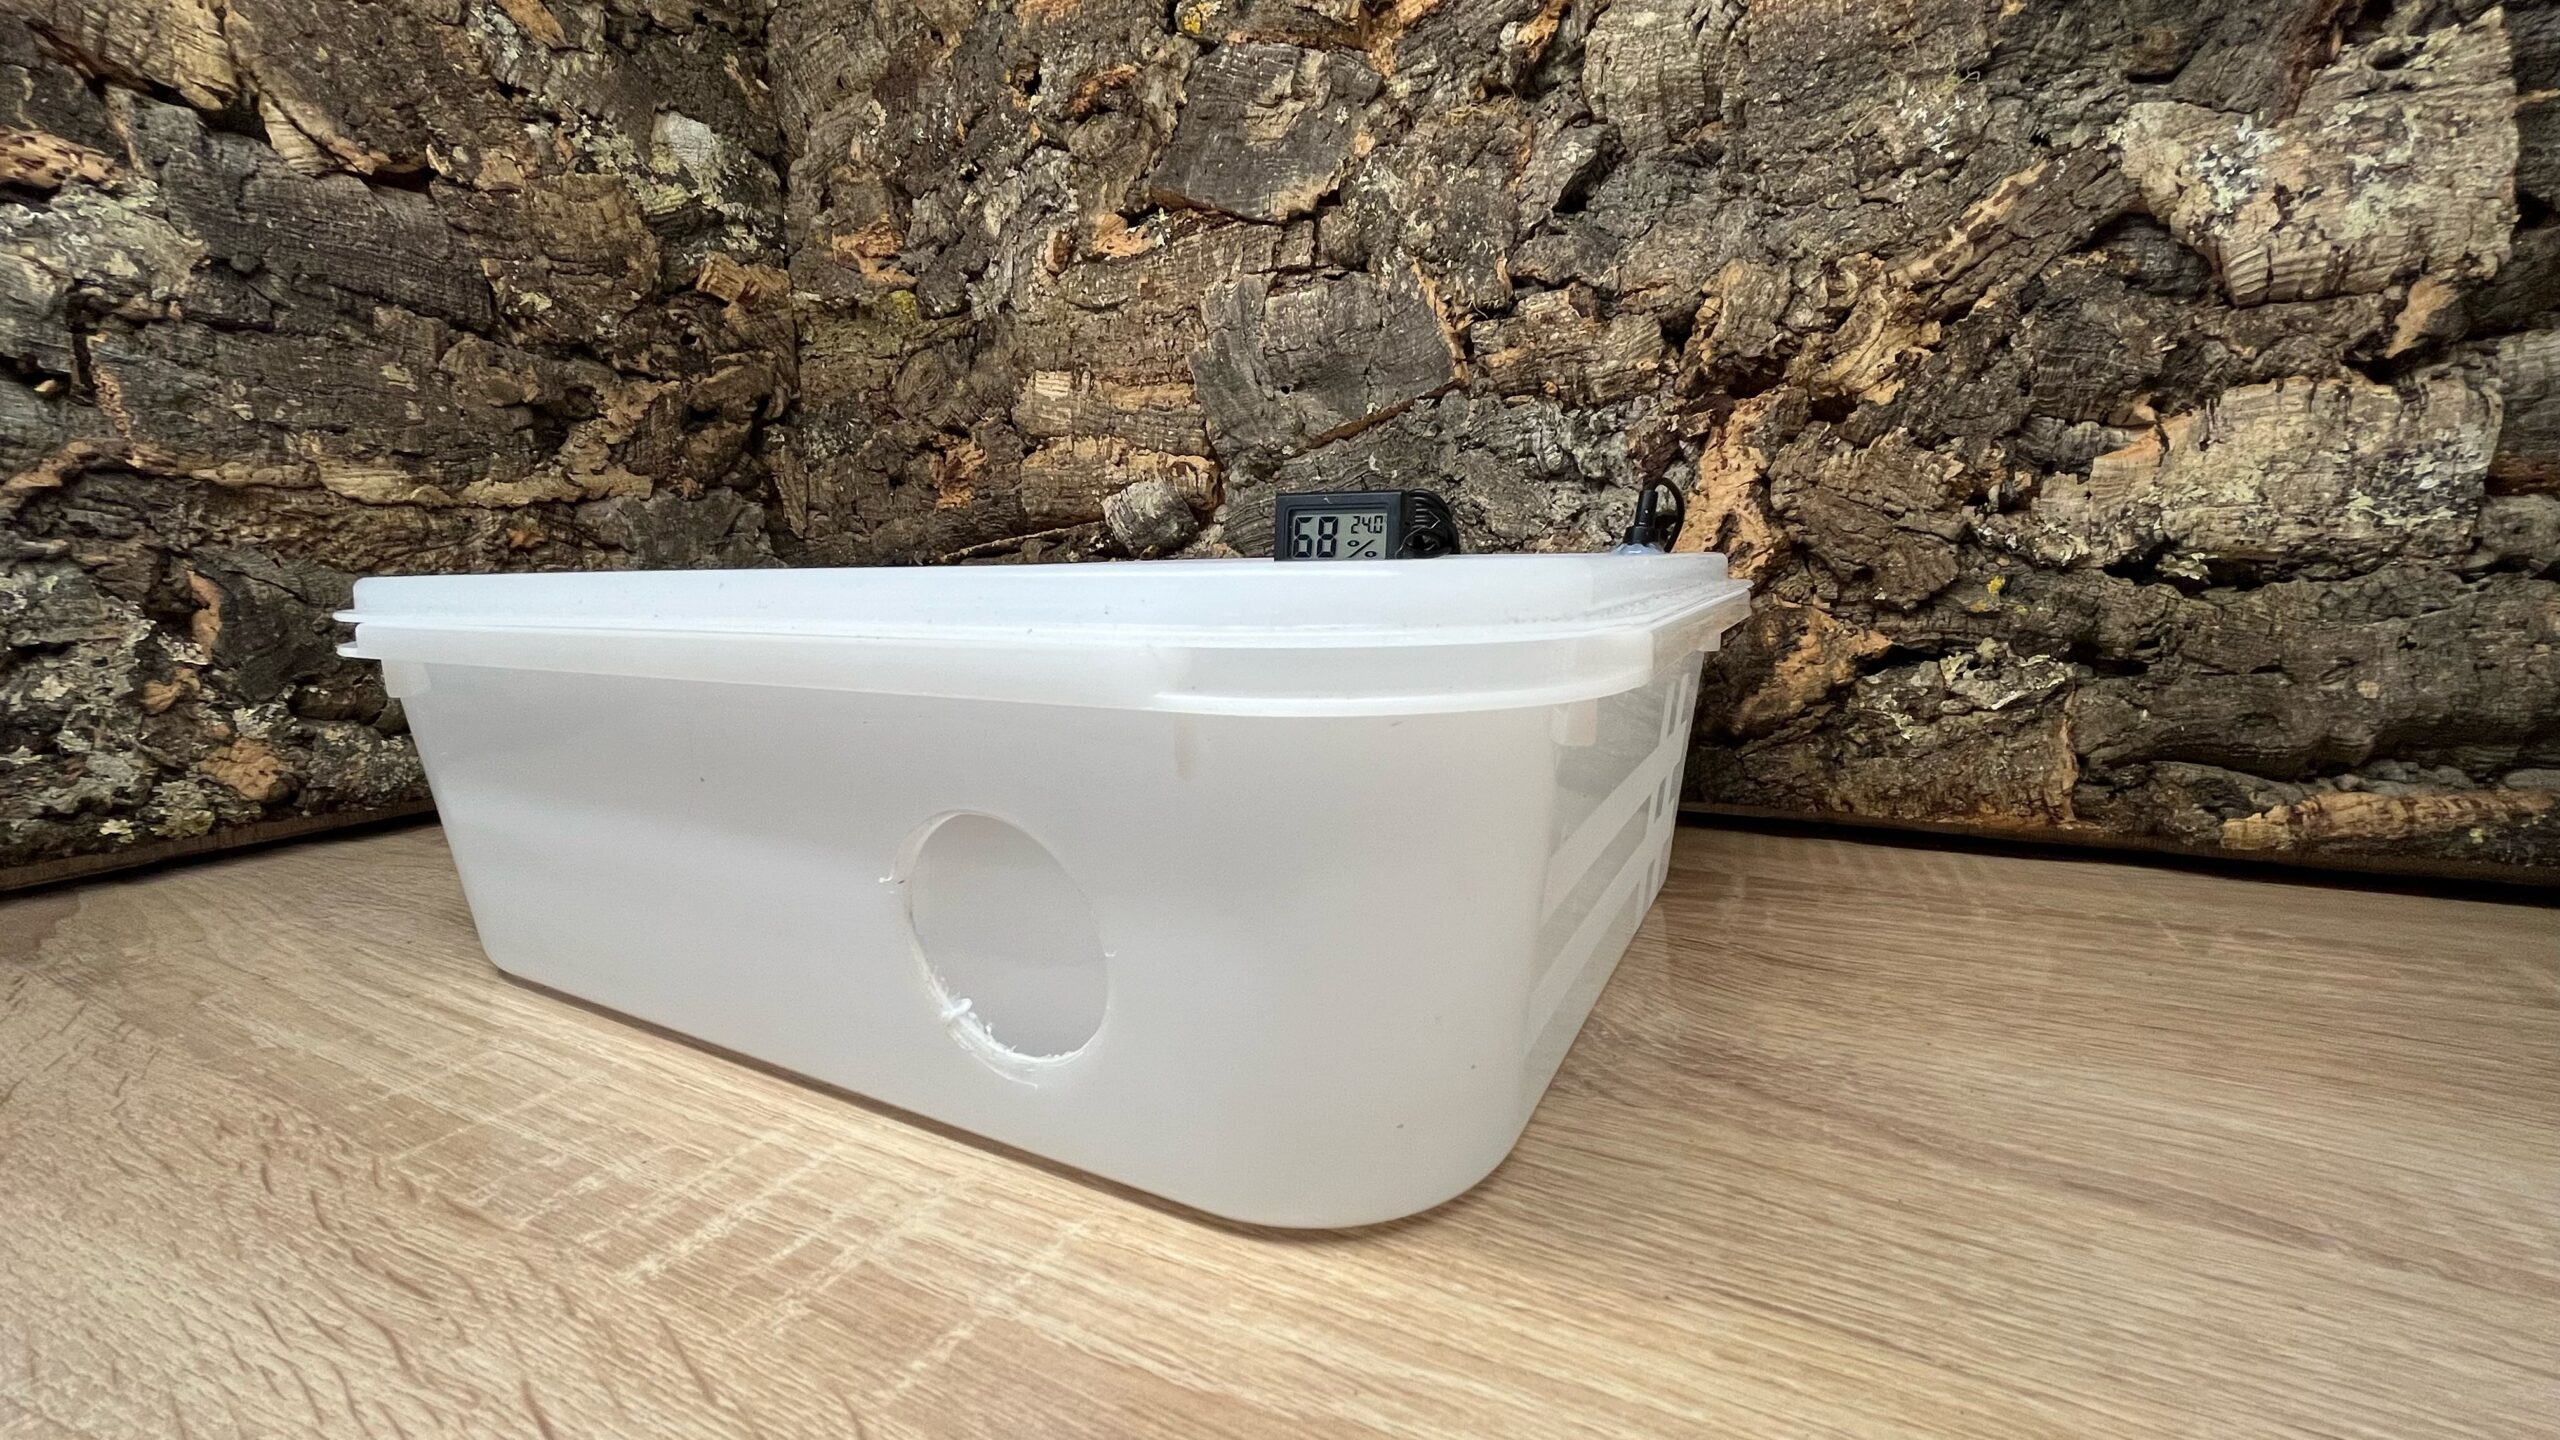
We use a sturdy plastic container with a secure lid. The size is deliberately considered: large enough for the female to move around, turn, and dig comfortably, but not so large that it feels open and exposed. A snake choosing a nesting site is looking for something enclosed and sheltered. A container that's too spacious defeats that purpose.
The lid serves two functions: it maintains humidity inside the box without requiring constant intervention, and it creates the darkness that encourages a female to settle. A lay box with an open top isn't a burrow. It's just a container with substrate in it, and that distinction matters to the snake even if it doesn't immediately seem significant to us.
We cut a single entrance hole on one side, sized to allow the female to move in and out comfortably without having to force herself through, but no larger than necessary. A smaller opening retains humidity more effectively and reinforces the enclosed, burrow-like quality of the interior.
The edges of the cut need to be smooth. Plastic cut roughly leaves edges that can abrade a snake's scales each time she enters or exits, and a female who is going in and out repeatedly over the course of egg laying is going to encounter that edge many times. Take the time to sand or file the edges properly.
A sealed plastic container with no air exchange becomes a stagnant, overly humid microenvironment. The condensation builds, the substrate becomes waterlogged rather than evenly moist, and the conditions inside drift away from what you're trying to maintain. We drill small holes around the upper portion of the sides to allow gentle air exchange.
The placement matters: holes near the top of the container allow warm, moist air to move while keeping the substrate level relatively enclosed. Holes at the bottom would drain humidity from the substrate directly, which you don't want.
We place a digital thermometer and hygrometer probe inside the box. Just the probes, with the display units mounted outside where they can be read without opening the lid. This gives us real time visibility into what's actually happening inside the lay box without disturbing the female.
This matters more than it might seem. The conditions inside a closed plastic box with damp substrate can differ significantly from the ambient conditions of the surrounding enclosure, and you want to be managing lay box conditions specifically rather than inferring them from enclosure readings.
The substrate inside the lay box is a blend of coconut fiber and damp sphagnum moss. This combination is moisture-retentive. It holds humidity consistently without needing constant remoistening, and has a texture that's soft enough to dig into but firm enough to hold the shape of a nest once the female has arranged it. It mimics the physical properties of natural nesting soil better than either material alone.
Moisture level matters: the substrate should be damp but not wet. Squeeze a handful — if water runs freely, it's too wet. If it holds its shape without releasing water, the moisture level is right. Eggs that sit in overly wet substrate in those first hours before transfer to the incubator are at higher risk of the issues that excess moisture causes throughout incubation.
Once the lay box is in the enclosure, the variables to manage are temperature and humidity inside the box specifically.
Temperature: we aim for around 27°C (80–81°F) inside the lay box. This is warm enough to be comfortable for the female and appropriate for the eggs in those first hours, without being at the higher end of incubation temperature.
Humidity: we target around 80% inside the box. This is higher than the ambient enclosure humidity for a western hognose setup, which is intentional. The lay box is a microenvironment designed to replicate the conditions of a natural nesting site, not the general enclosure climate. If humidity drops below this, light misting of the substrate (not the eggs) brings it back without dramatically disrupting conditions.
We check readings daily once the lay box is in the enclosure. Adjustments are usually minor — a light misting here, slightly increased ventilation there — but the consistency of monitoring is what catches drift before it becomes a problem.
Timing the lay box introduction matters because you want the female to have time to discover and become comfortable with it before she's actively ready to lay, but you don't want it sitting in the enclosure so far in advance that it dries out or becomes part of the background furniture she stops paying attention to.
The signals we watch for: reduced appetite (most gravid females slow or stop feeding as they approach laying), increased restlessness and enclosure exploration, more time spent pressed against enclosure walls or in specific corners, and visible changes in body shape as the eggs shift position in the final days before deposition. When we see these, the lay box goes in.
If you have a post ovulation shed date to work from, that's the most reliable anchor point. The pre lay shed typically occurs four to ten days before laying, so introducing the lay box shortly after the post ovulation shed gives you a reasonable buffer.
Once a gravid female has settled in the lay box and begun laying, leave her alone. The instinct to check, observe, or assist is understandable, especially the first time you go through this. But disturbance during active egg laying is stressful and can cause a female to abandon the process before she's finished.
The laying process can take several hours. Check in periodically but quietly, from a distance if possible, and don't remove the lay box or attempt to access the eggs until she has clearly finished and left the box of her own accord.
Once she's done, remove the lay box from the enclosure for egg transfer. The candling and incubator setup process from that point is covered in our egg laying post, but the lay box has done its job at this point, and the next stage belongs to the incubator.
The lay box is a small thing in the context of a full breeding season, and it's easy to treat it as an afterthought once the more visible milestones (pairing, lock, gravid development, pre lay shed) have passed. But it's the bridge between all of that preparation and the eggs actually making it into the incubator in good condition.
A female who trusts her lay box uses it reliably. Eggs deposited in appropriate conditions start incubation in better shape than those laid in suboptimal circumstances. The difference in hatch rate between a clutch that was well-managed from the moment of deposition and one that wasn't is real, even if it's not always obvious in a single season.
Build it properly, introduce it at the right time, maintain the conditions inside it, and let the female do the rest.

No comments yet — be the first.